How to Install Datapacks on Your Minecraft Server
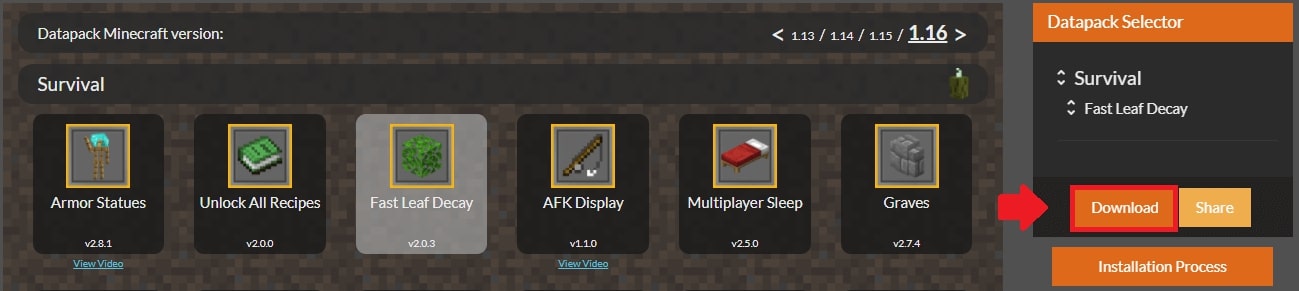
The first step is to find a suitable datapack for you. You can find multiple different datapacks on a website called VanillaTweaks.
Once you have selected your datapack, click on “Download”.
Extract the .zip file onto your desktop.
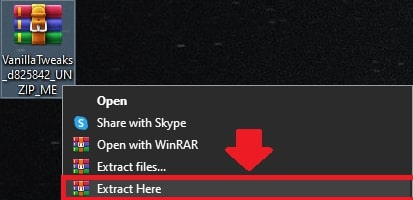
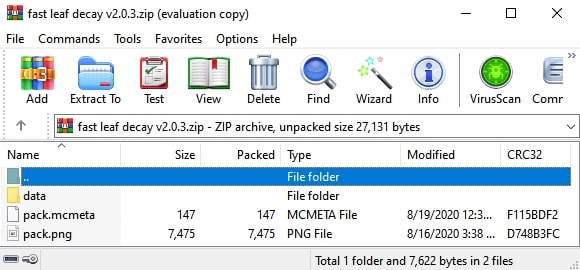
You will be left with another .zip file that contains all the required files to make a datapack work on your Minecraft server. Keep those three files inside the .zip file.
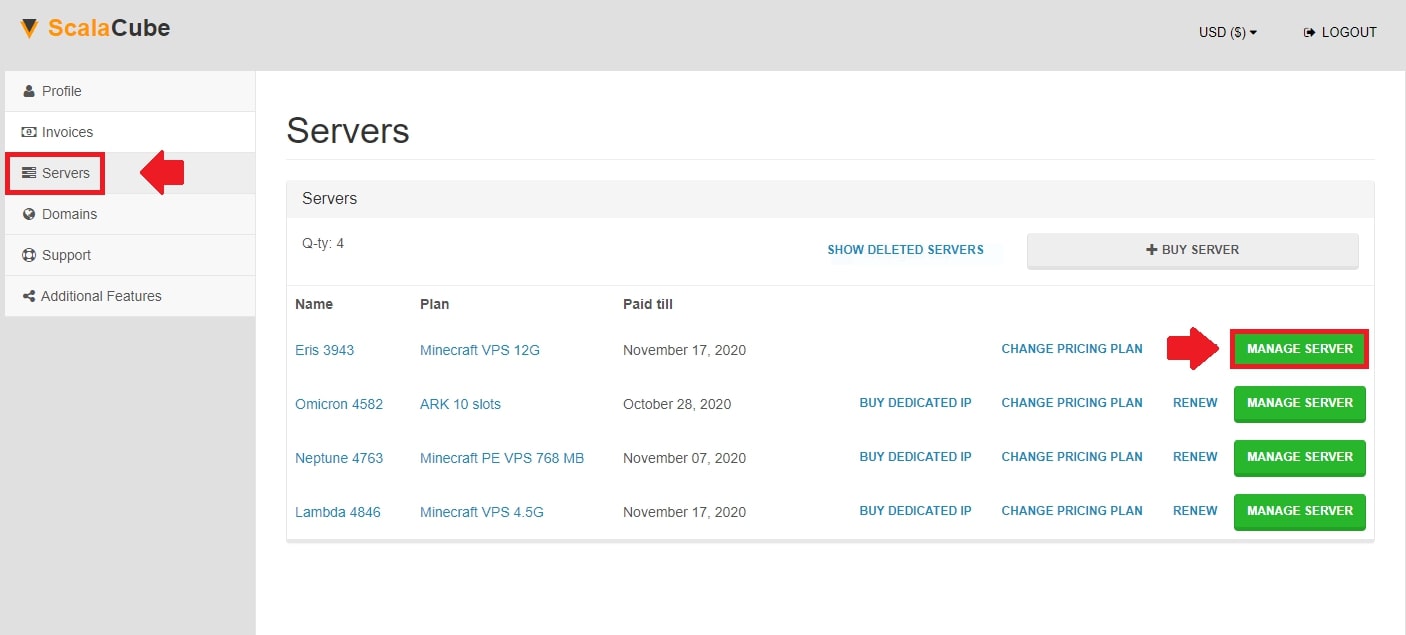
Next, go to Scalacube.com and log in to your control panel.

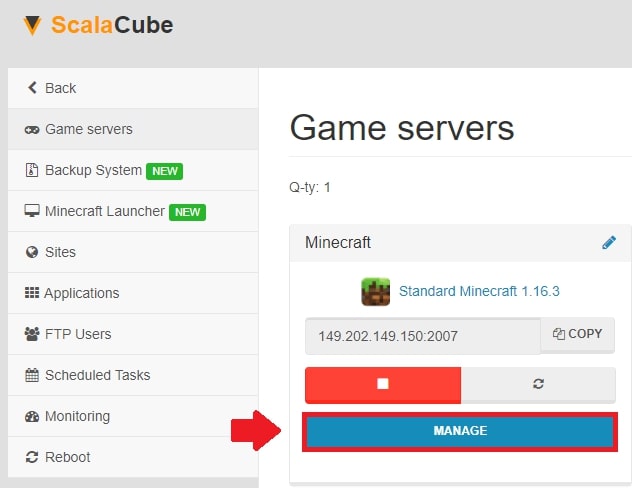
Click on "Servers" and click on "Manage server".
Click "Manage" again.
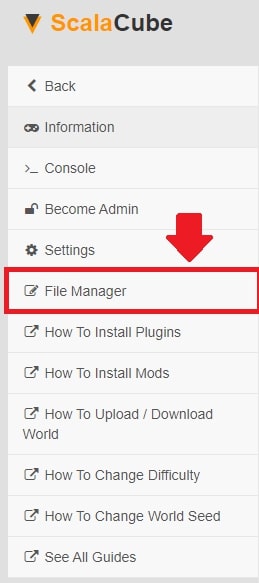
Find the “File Manager” on the left tab and enter it.
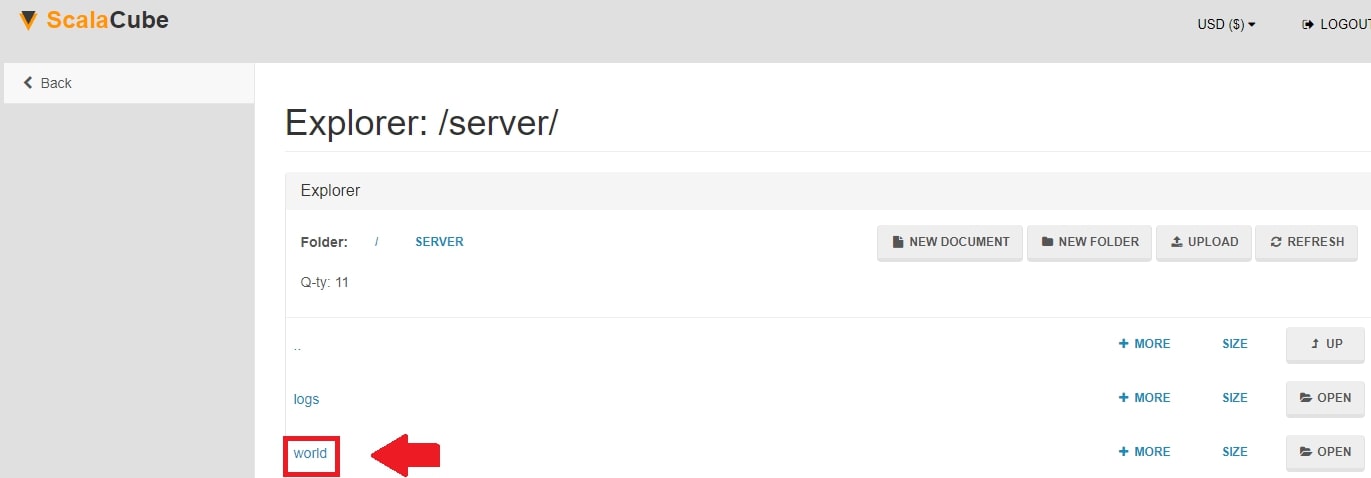
Locate your “world” folder and enter it.
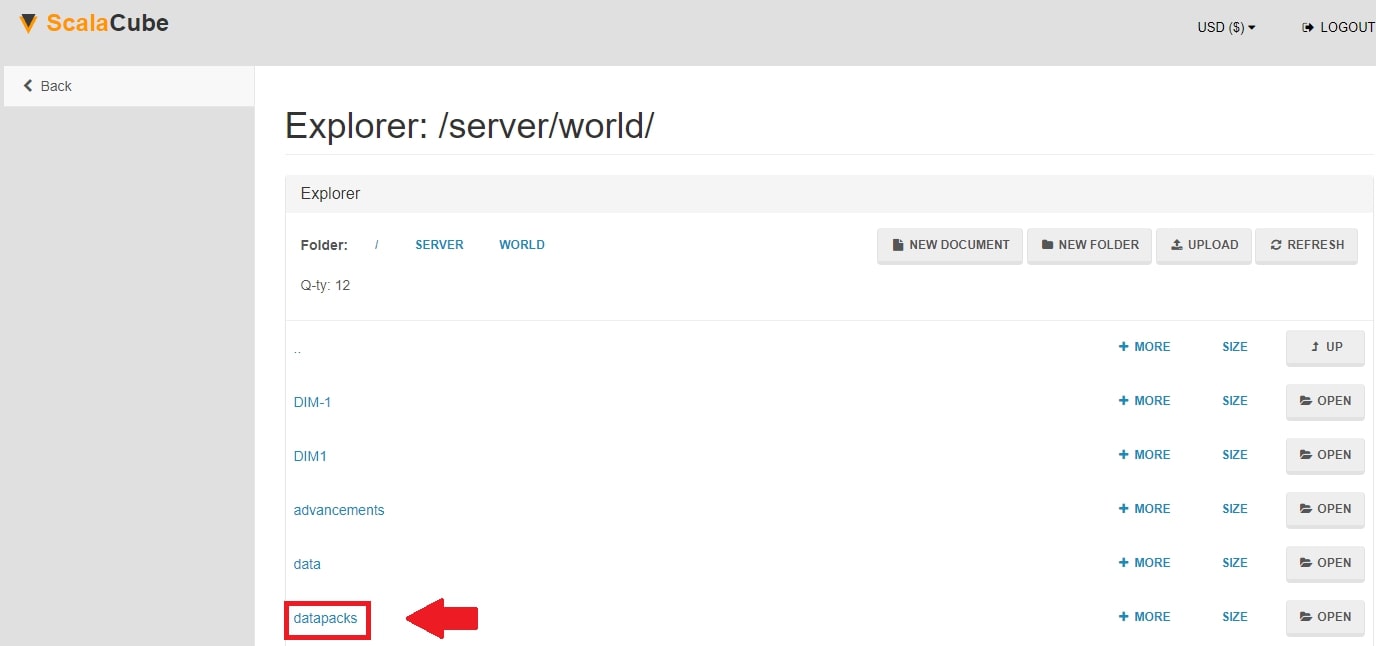
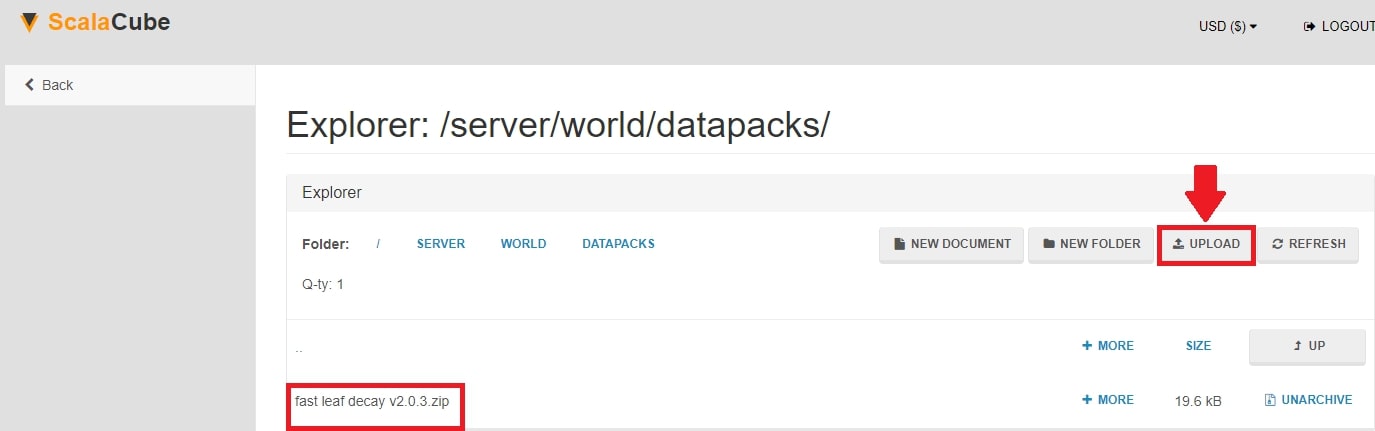
Locate the “datapacks” folder and enter it.
Click on "Upload" at the top right, select your datapack and click "Upload".
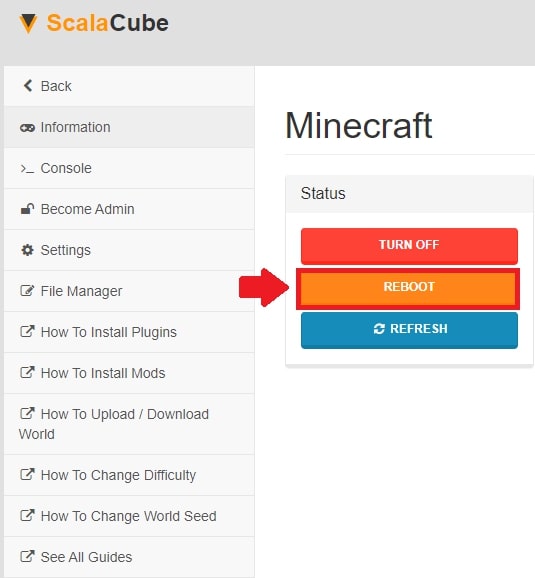
Once this is done, go back and reboot your server by clicking on the button labeled "Reboot" and wait for the process to finish.
The datapack has been uploaded and will be waiting for you once you enter your server.
By entering /datapack in the console, you can view all the datapacks your server currently has.
If the datapack is not functional, go back and make sure that you uploaded it into the correct folder and that it contains all the correct files required.
Congratulations! You now know How to install datapacks on Scalacube
FAQ
What kind of datapacks can I use on my Minecraft server?
Datapacks come in multiple shapes and sizes, allowing you to tweak your Minecraft world in unique ways. From changes in game rules, new advancements, or interesting structures, you'll find a variety of datapacks to suit your needs on VanillaTweaks.
Can I use more than one datapack on my server?
Absolutely! Just make sure to follow the installation guide for each datapack and upload them to the "datapacks" folder. Your Minecraft server will handle multiple datapacks simultaneously.
How do I know if my datapack was successfully installed?
Once you've followed the installation steps and rebooted your server, log into your Minecraft world and type the /datapack list command into the console. You'll see a list of datapacks currently active on your server.
Can I remove a datapack from my Minecraft server?
Sure thing! Head back to the "datapacks" folder in your Scalacube File Manager, find the datapack you wanna ditch, and delete it. Don't forget to reboot the server to make the changes take effect.
Will installing a datapack affect my existing world?
Datapacks work by adding or modifying game elements, so they might have an impact on your current world. It's always best to create a backup of your world before trying new datapacks to ensure nothing important gets lost.
Are datapacks safe to use?
Datapacks from reputable sources, like VanillaTweaks, are generally safe to use. Just be cautious when downloading and using datapacks from unknown sources as they may contain harmful or undesired code.
Can I create my own datapack?
Of course! If you have some coding skills, you can create custom datapacks tailored to your Minecraft experience. Simply follow Minecraft's guidelines on creating datapacks and get ready for a personalized adventure.
Can I share my datapack with friends?
You bet! Just send them the .zip file containing your datapack, and they can follow the installation guide to enjoy your creation on their Minecraft server.
What should I do if my datapack isn't working?
If your datapack isn't working as expected, double-check that you uploaded it to the correct folder and that all required files are present. If the issue persists, contact Scalacube support for guidance.
How do I update an existing datapack on my server?
To update a datapack, first remove the old version from your server's "datapacks" folder. Next, upload the updated .zip file and reboot the server. Your world is now running with the latest version of the datapack.
Summary:
- Have a Datapack ready to upload to the server
- Log into your Scalacube account control panel
- Go to Manage server > Manage > File Manager > world > datapacks
- Upload your Datapack and restart the server
- Connect to your Minecraft server
Make Your Own Minecraft Server
Your own Minecraft server is only 5 minutes away! We support simple one click install for over 3298 unique modpacks.
Start Your Minecraft Server Today!