How To Make Monster Hunter Wilds Look Better
Let’s be real—Monster Hunter Wilds is a beast of a game. The combat slaps, the monsters are terrifyingly gorgeous, and the character creator lets you make anything from a rugged anime hero to a pixel-perfect recreation of your favorite movie star. But are you wondering how to make Monster Hunter Wilds look better and visually appealing? Because yes—despite all that greatness, the game can look weirdly washed out. Like someone smeared a fog filter over the whole world. That soft, grayish haze? That’s not your monitor crying. It’s the default Capcom filter, and it’s got a lot of players side-eyeing their screens wondering, "Is it supposed to look like this?" Good news: you can absolutely make Monster Hunter Wilds look better—and here’s how.
The Mod Route: ReShade to the Rescue

Make Your Own game Server
If you’re on PC, you’ve got the golden ticket. The Monster Hunter Wilds ReShade mod is the community’s go-to fix for the game’s underwhelming visuals. It won’t overhaul your Monster Hunter Wilds graphics mod or mess with performance too much—it just sharpens things up, boosts color, and removes that dull, grayish fog. Like putting glasses on the game.
Step 1: Get REFramework
Before you can apply any ReShade mods, you need REFramework—a modding base that lets other scripts (like ReShade) work smoothly with Monster Hunter Wilds. Installing it is super simple:
- Head over to Nexus Mods and download REFramework.
- Right-click your game in Steam, hit Manage → Browse Local Files.
- In that folder, drop the file named dinput8.dll. Boom. That’s it. REFramework is now installed, and your game is ready to welcome in the glow-up.
Step 2: Install ReShade + Wilds Rehydrated Mod
With REFramework installed, now you can actually apply the ReShade filter—and specifically, we’re using Wilds Rehydrated Mod, a fan-made preset that dramatically improves color and lighting. Here’s the step-by-step:
- Download Wilds Rehydrated – ReShade from Nexus Mods.
- Extract the file and copy the .ini file into your Monster Hunter Wilds installation folder (same spot where you dropped REFramework).
- Go to the official ReShade website and grab the latest version of the ReShade installer.
- Run the installer and:
- Select Monster Hunter Wilds from your game list (or point it to the .exe file).
- Choose DirectX 10/11/12 as your rendering API.
- When prompted for effect packages, select Browse and choose the .ini file you copied earlier. Once you're done, launch the game. Press Home when prompted, and the ReShade menu will walk you through the rest. You’ll notice the difference right away—colors pop, shadows look legit, and the game finally feels alive.
Don’t Want Mods? Try These In-Game Settings
If you’re on console—or just don’t want to mess with mods—you can still tweak certain things to look a little sharper with in-game Monster Hunter Wilds visual settings. The changes are subtle, but they make a difference, especially if you stack them right.
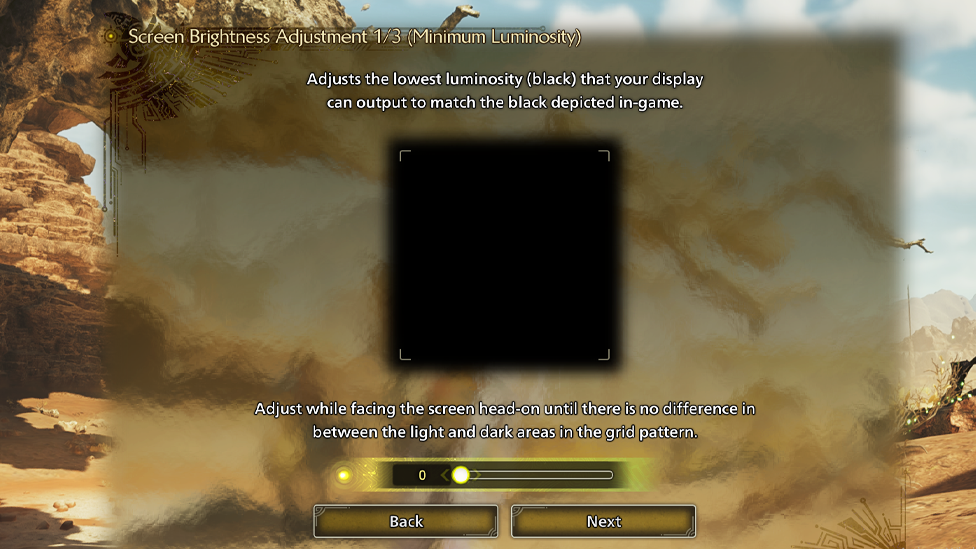
Adjust Brightness Settings
Go to your Display Settings and try this:
- First brightness slider: 0
- Second slider: 20
- Third slider: Near zero This setup reduces that foggy overlay and gives environments better contrast, making lighting look more natural and areas more visually dynamic. Yes, it may darken some spots, but it helps highlight details like monster scales, terrain shadows, and more.
Turn Off Motion Blur
Motion Blur is one of those features that sounds cool but usually just turns fights into a blurry mess. Disabling it can help make visuals crisper and more readable—especially during fast-paced hunts. Monitor Tweaks for Extra Polish Here’s a trick most players overlook: your monitor. Tuning your monitor’s contrast and saturation can make a huge difference. Try increasing both a little to make day maps look warmer and shadows stand out more. It doesn’t affect performance and helps bring out textures that otherwise feel washed out.
Final Touches and What to Expect
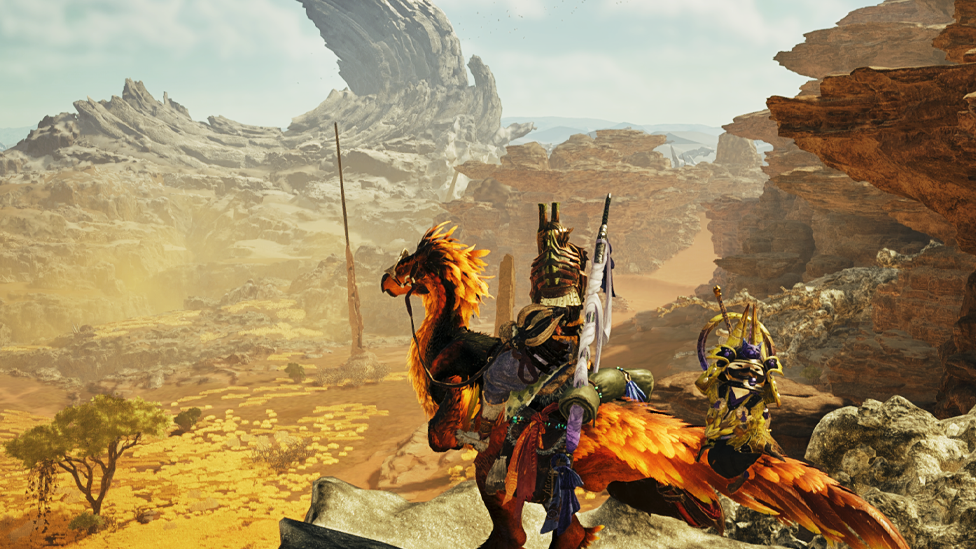
After applying these changes—whether modded or vanilla—you’ll start noticing details you probably never saw before. Like the shimmer on a monster’s hide when sunlight hits it, or the subtle texture of rock walls while exploring. Sure, the game still has that cinematic Capcom vibe. But now it looks intentional rather than weirdly foggy. And the best part? Your game still runs buttery smooth, with better visuals as the cherry on top.
TL;DR – Quick Fix Guide
Here’s your cheat sheet to make Monster Hunter Wilds actually look wild:
- Download REFramework from Nexus
- Install Wilds Rehydrated – ReShade for better color and contrast
- Tweak in-game brightness sliders (0 / 20 / ~0)
- Turn off Motion Blur
- Adjust monitor contrast/saturation for extra pop
Scalacube - Experience Gaming At Its Best With Zero Lags
Looking for smooth gameplay without lag or disconnects? Scalacube’s reliable game server is a must. Partnering with Scalacube’s dedicated game server can improve the experience even further. With customized configurations, guaranteed stable performance, and low-latency connections, Scalacube server hosting allows for smooth multiplayer matches. Not just that, with Scalacube you also get to enjoy full FTP access, mod support, DDoS protection, and 24/7 support—all at unbeatable prices.
Wrapping Up
Monster Hunter Wilds already delivers on action, monsters, and storytelling. But now you know how to make Monster Hunter Wilds look better with a little DIY graphics work, it can finally look as good as it plays. Whether you’re diving into ReShade mods or just tweaking your brightness, you’re one step closer to a game world that feels as alive as the creatures you’re hunting.
FAQs
How do I install REFramework for Monster Hunter Wilds?
To install REFramework, download it from Nexus Mods, then go to your Monster Hunter Wilds installation folder (right-click the game in Steam > Manage > Browse Local Files). Copy the dinput8.dll file into that folder. This sets up your game to support additional mods like ReShade.
What are the best brightness settings in-game to improve visuals without mods?
Adjust the brightness sliders in the settings like this:
- First slider: 0
- Second slider: 20
- Third slider: Near 0 These tweaks reduce dull tones and improve color contrast, especially in brighter environments.
Which ReShade preset is recommended for Monster Hunter Wilds?
The recommended preset is Wilds Rehydrated – ReShade. It enhances colors and lighting without drastically altering the visuals. Simply download it from Nexus Mods, install ReShade, and apply the Wilds Rehydrated .ini file during the setup.