Defeating the Trial Chambers in Minecraft
Make Your Own Minecraft Server
Your own Minecraft server is only 5 minutes away! We support simple one click install for over 3298 unique modpacks.
Minecraft Server Hosting
There are many different ways to enjoy your game in Minecraft, and with the introduction of Trial Chambers in the Version 1.21 update, this offers a brand new challenge to take on when running a game on your own Minecraft server.
However, while experiencing this exciting new challenge for the first time can undoubtedly be exciting, it’s worth noting that defeating the Trial Chambers in Minecraft isn’t a simple process. In line with this thought, today, we’re looking at what the Trial Chambers are to help you decide how to approach this new challenge and learn how to beat your first Trial Chamber in Minecraft. This might just help your own adventure, too!

What is a Minecraft Trial Chamber?
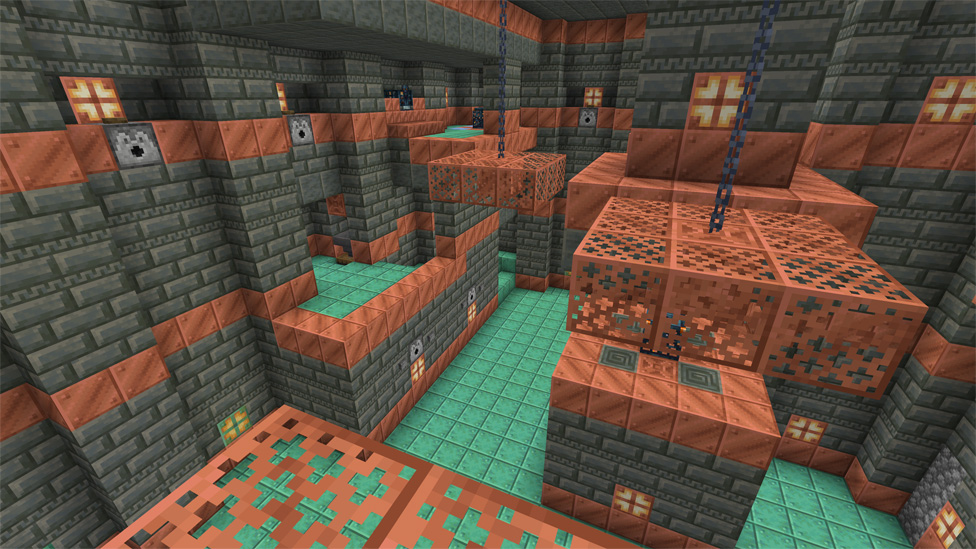
Before we head further into looking at how to beat the Trial Chamber, we first need to briefly outline what the Trial Chamber itself looks like. Simply put, Trial Chambers in Minecraft are unique dungeons that spawn underground in the Overworld, offering a new way for players to explore the world. However, the Trial Chambers are far more than just another type of Minecraft cave system; instead of just being a randomly generated system of caverns and empty spaces with little connectivity overall, Trial Chambers are much more structured, making them a very different sort of adventure.
How to Find Trial Chambers in Minecraft
By now, we’ve briefly outlined what Trial Chambers are in Minecraft—however, you may be wondering about how to actually find these elusive structures. Indeed, whereas cave systems are (quite literally) easy to stumble across in Minecraft, Trial Chambers work a little differently. Thus, it’s paramount that you first know how to find Trial Chambers in Minecraft before you go looking for them.
Finding the Minecraft Trial Chamber Entrance
Instead of being easy and quick to find like caves and typical underground systems, Trial Chambers specifically require you to obtain a Trial Explorer Map first. This allows you to find a Trial Chamber that you can take on. You may not necessarily need to get a Trial Explorer Map first, but it’s well worth noting here that finding a Trial Chamber without will be incredibly difficult and unlikely.
In order to get hold of a Trial Explorer Map, you’ll need to find a Journeyman-level Cartographer Villager. If you’ve been struggling to find such an NPC, you can always craft a cartography table and place this near a villager, which may turn them into a Cartographer.
Once you’ve got hold of a Trial Explorer Map, opening it allows you to quickly see where the location of the Trial Chamber is, which is indicated by a marker on the map. However, this won’t indicate whether the entrance to the Trial Chamber is underground, so be prepared to dig around to find the entry.
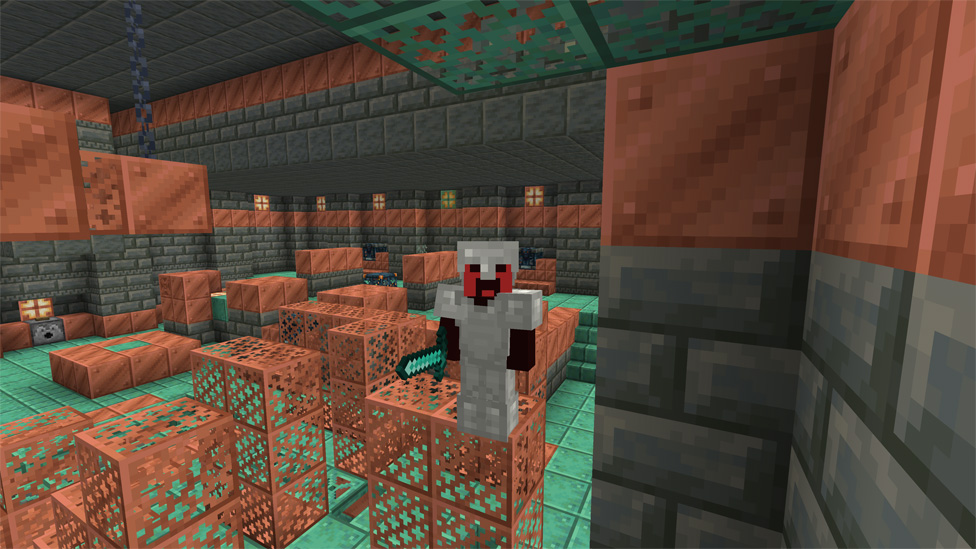
Entering the Trial Chamber typically begins in the initial spawning room, where you’ll see numerous Trial Spawners throughout the space. Perhaps unsurprisingly, these spawn a range of different mobs into the game, doing so repeatedly; however, there is a maximum to the number of foes each spawner will create. Thus, taking the enemies down ASAP is important to maximize your chances of success within the Trial Chamber.
How to Beat a Trial Chamber in Minecraft
By now, we’ve looked at how to begin your Trial Chamber adventure—but how can you actually beat a Trial Chamber in Minecraft? Well, there are several ways to beat a Trial Chamber in Minecraft, and keeping these in mind can help with your mission.
Simply put, in order to beat the Trial Chamber in Minecraft, you’ll need to defeat all of the enemies spawned by the Trial Spawners in a particular area. To this end, taking them all down is hugely important—and there are a few ways to make this a little less straightforward. These include the following tips to help you beat the Trial Chamber in your Minecraft game.
Frequently Asked Questions
Final Thoughts
If you’ve been wondering about how to successfully take on the Trial Chamber in Minecraft, today’s guide should hopefully have helped. However, keep in mind here that Trial Chambers aren’t a walk in the park, and with many different enemies to face off against, you’ll need to be well-equipped before you venture through a Minecraft Trial Chamber’s entrance. So, don’t rush in without prepping carefully first!
However, while experiencing this exciting new challenge for the first time can undoubtedly be exciting, it’s worth noting that defeating the Trial Chambers in Minecraft isn’t a simple process. In line with this thought, today, we’re looking at what the Trial Chambers are to help you decide how to approach this new challenge and learn how to beat your first Trial Chamber in Minecraft. This might just help your own adventure, too!
What is a Minecraft Trial Chamber?
Before we head further into looking at how to beat the Trial Chamber, we first need to briefly outline what the Trial Chamber itself looks like. Simply put, Trial Chambers in Minecraft are unique dungeons that spawn underground in the Overworld, offering a new way for players to explore the world. However, the Trial Chambers are far more than just another type of Minecraft cave system; instead of just being a randomly generated system of caverns and empty spaces with little connectivity overall, Trial Chambers are much more structured, making them a very different sort of adventure.How to Find Trial Chambers in Minecraft
By now, we’ve briefly outlined what Trial Chambers are in Minecraft—however, you may be wondering about how to actually find these elusive structures. Indeed, whereas cave systems are (quite literally) easy to stumble across in Minecraft, Trial Chambers work a little differently. Thus, it’s paramount that you first know how to find Trial Chambers in Minecraft before you go looking for them.Finding the Minecraft Trial Chamber Entrance
Instead of being easy and quick to find like caves and typical underground systems, Trial Chambers specifically require you to obtain a Trial Explorer Map first. This allows you to find a Trial Chamber that you can take on. You may not necessarily need to get a Trial Explorer Map first, but it’s well worth noting here that finding a Trial Chamber without will be incredibly difficult and unlikely.In order to get hold of a Trial Explorer Map, you’ll need to find a Journeyman-level Cartographer Villager. If you’ve been struggling to find such an NPC, you can always craft a cartography table and place this near a villager, which may turn them into a Cartographer.
Once you’ve got hold of a Trial Explorer Map, opening it allows you to quickly see where the location of the Trial Chamber is, which is indicated by a marker on the map. However, this won’t indicate whether the entrance to the Trial Chamber is underground, so be prepared to dig around to find the entry.
Entering the Trial Chamber typically begins in the initial spawning room, where you’ll see numerous Trial Spawners throughout the space. Perhaps unsurprisingly, these spawn a range of different mobs into the game, doing so repeatedly; however, there is a maximum to the number of foes each spawner will create. Thus, taking the enemies down ASAP is important to maximize your chances of success within the Trial Chamber.
How to Beat a Trial Chamber in Minecraft
By now, we’ve looked at how to begin your Trial Chamber adventure—but how can you actually beat a Trial Chamber in Minecraft? Well, there are several ways to beat a Trial Chamber in Minecraft, and keeping these in mind can help with your mission.Simply put, in order to beat the Trial Chamber in Minecraft, you’ll need to defeat all of the enemies spawned by the Trial Spawners in a particular area. To this end, taking them all down is hugely important—and there are a few ways to make this a little less straightforward. These include the following tips to help you beat the Trial Chamber in your Minecraft game.
- Only trigger one spawner at a time. The trial spawners will trigger when you approach them. As such, keeping close to just one spawner at a time will allow you to take on one wave of enemies at a time, so there’s less chance of getting overwhelmed.
- Understand each enemy. The specific types of foes in the Trial Chambers vary considerably in terms of abilities. As such, understanding each enemy before you head into the Trial Chamber is crucial to ensure you are tackling each foe in an effective manner.
- Leave behind markers as you explore. Inevitably, Trial Chambers are often incredibly hard to navigate. As such, leaving behind markers for how to find the edit could prove incredibly helpful for your game.
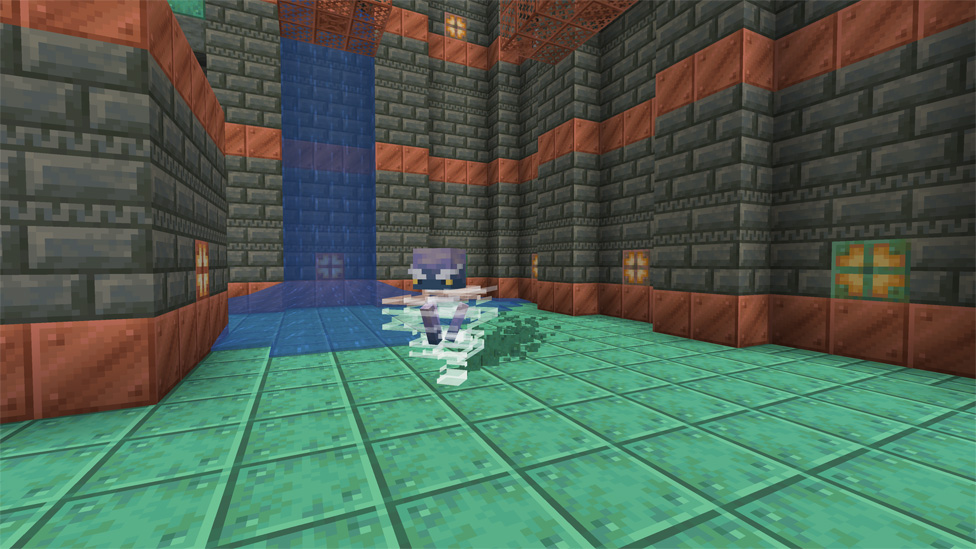
- Bring milk and water. Milk and water are both excellent items to bring to your Trial Chamber adventures. Milk is able to restore your status conditions, while water will often be essential for puzzle-solving while inside the Trial Chamber.
- Be aware of traps. Needless to say, traps are incredibly common in Trial Chambers. However, you can always set them off yourself, so watching out for and avoiding traps is crucial.
Frequently Asked Questions
Are Trial Chambers based on a set design?
No. Trial Chambers are procedurally generated; however, they are unique, meaning that every Trial Chamber will have a slightly different map and layout.
Why can’t I complete the Trial Chambers?
If you’re struggling to complete the Trial Chambers, it’s worth checking if they are further floors lower down. Indeed, Trial Chambers regularly spawn over several floors, making them even harder to navigate.
Final Thoughts
If you’ve been wondering about how to successfully take on the Trial Chamber in Minecraft, today’s guide should hopefully have helped. However, keep in mind here that Trial Chambers aren’t a walk in the park, and with many different enemies to face off against, you’ll need to be well-equipped before you venture through a Minecraft Trial Chamber’s entrance. So, don’t rush in without prepping carefully first!
Make Your Own Minecraft Server
Your own Minecraft server is only 5 minutes away! We support simple one click install for over 3298 unique modpacks.
Start Your Minecraft Server Today!