In this guide, you’ll learn how to create a Minecraft server and play with your friends in minutes.
Unfortunately, creating a server isn’t as simple as pressing “Start Multiplayer Game” like some other titles. You need a server for your friends to connect to, and Mojang doesn’t offer free hosting to players.
This means you’ll need to host your own server. There are two ways of doing this:
- Hosting a server on your computer
- Using a third-party Minecraft host like ScalaCube
You can do either one, but using third-party hosting will always be the easiest and least expensive choice.
Choosing to setup a local server
Opting for running a server on your own computer is an option and will not cost you a penny. It will however mean that the server will be running on your own computer, using the same resources as you would. If you are instead opting for this method, these steps will get you up and running in no time.
1. Make sure your Java version is up-to-date.
Having the latest version of Java ensures everything will be running as it should, as Minecraft is a Java based game.
2. Download a Minecraft_Server.jar file from the official Minecraft website.
You can obtain server files for free from the official Minecraft website, go to the
Minecraft server downloads page and download the latest available version.
Once the download is completed, copy the downloaded .jar file into a new folder created on your desktop.
Double-click on the downloaded .jar file and run it.
This will now generate some server files inside your created folder.
3. Creating a batch file to run your server.
- Right-click the existing folder and select "New" - "Text Document".
- Inside the Text Document, paste the following line: java -Xmx1024M -Xms1024M -jar minecraft_server.1.19.3.jar
- Click on "File" and then select "Save As"
- In the "Save As Type" field, select "All Files"
- Name the document "Run.bat". and then Save
Your server folder should look like this:
4. Agreeing to EULA
EULA, or End User License Agreement has to be agreed to before your server can start.
To do this, Double-click eula.txt, and change the line from "eula=false" to "eula=true". Save changes and exit the Text document.
5. Starting your server
Once these steps have been completed, it is now time to start your server for the very first time. To do this, Double-click on "Run.bat" and the server will then begin it's startup process.
A server window will appear where it shows your server process. As long as this window is open, your server is up and running.
6. Connecting to your server
The method to connect to your server is simple, we'll provide the steps required below:
- Start Minecraft.
- Click "Multiplayer".
- Select "Add Server".
- Add a unique name to your server so you can differentiate it.
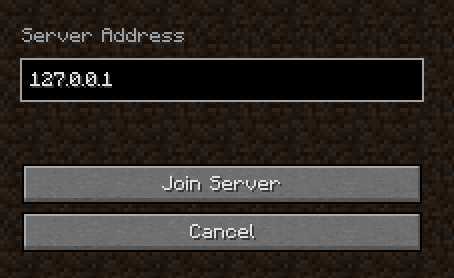
- In the "Server Address" field, add "localhost".
- Save the changes and click on "Join Server".
7. Allowing other to connect to your server.
In order to allow your friends to connect to your server, you will need to do a process called "Port forwarding". Which means adjusting some settings on your Router.
Guides regarding Port Forwarding can be found online specific to your Router model.
8. Finding your External IP address and connecting to your server.
Once your ports are forwarded, the last step is to find out what your External IP address is.
If you go to Google and search for "What is my IP" or "External IP", it will tell you what your IPv4 address is. This is the one you will require.
In this instance, the External IP would look like this: 90.131.17.135
Next, start your game again and do the previous steps regarding adding your server on the server page, but instead add 90.131.17.135:25565 in the "Server Address" area and Save it.
If the previous steps have been completed correctly, the server will show up and be online. Now, you can provide that address to anyone who you would like on your server.
If by some reason it isn't working correctly, re-do the previous steps and see if you might have missed something, or use our platform to get yourself a
Minecraft server already setup out of the box which will get you from purchase to connection in a matter of minutes.
Why Setting Up a Minecraft Server at Home Isn’t Recommended
Making a Minecraft server on your own computer makes no sense compared to third-party hosting. We don’t say that because we’re a hosting provider but because at-home hosting is a massive hassle and security risk.
Here’s why:
Hardware Requirements
Hosting a Minecraft game requires your computer to support all players at once—not just one person like in singleplayer. Multiple players will quickly eat up all your CPU and RAM resources, forcing everyone on the server to suffer horrible lag.
Hosting with ScalaCube guarantees your server’s hardware can handle Minecraft hosting. And if your player count grows too high and your server slows down, you can upgrade instantly.
Security Risks
Hosting any game on your computer requires you to port forward your IP.
This exposes your network to hackers, letting them snoop in on your entire network easily. You won’t have any protection from DDoS either, making it easy for trolls to ruin your gaming experience.
Both of these problems present huge security risks—especially if you want to host many players at once. Hosting with ScalaCube keeps your network secure while providing full DDoS protection.
Network Requirements
You need fast internet to host a server for more than a few players. And the more players you have, the more bandwidth your server will consume, slowing down your network for everyone else connected.
ScalaCube servers have incredibly fast internet speeds, guaranteeing your server will never experience any internet-related bottlenecks.
Technical Support
You have nobody to help you when configuring your self-hosted Minecraft server. If you have issues, you'll have to depend on your own knowledge and information found on the internet (which may not even be accurate).
But ScalaCube clients don't struggle with technical issues. If they ever have difficulties, they can contact a Minecraft expert to solve their issues 24/7.
Convinced that dedicated Minecraft hosting is the best option for multiplayer? Now it’s time to create your server and start playing within minutes.
1. Go to
our hosting page and click “Sign Up” in the top right corner. Here, you’ll create an account (or log in to your existing one).
2. Click on “Servers,” then “Buy Server.”
3. Select "Minecraft.”
4. Click "Get Your Server.”
5. Click "Next.”
6. Choose your location, then click "Next.”
7. Choose the Minecraft version you want your server to run. It's free to change later at any time.
8. Click "Next.”
9. Choose your server plan based on the number of players you expect on your server.
We suggest choosing the recommended plan for best performance, but you can upgrade at any time later.
10. Choose your Server Address. Here, you can select the free subdomain we offer to all subscribers.
You can change this at any time later.
11. Select applications for your server. If you want automated backups (highly recommended), you can enable them here for a one-time fee.
12. Confirm your selections and click “Pay.” You’ll automatically receive a 50% discount on your first purchase.
13. Choose your payment method and complete your purchase.
14. Go to your account, click on “Servers,” and find “Manage Server.”
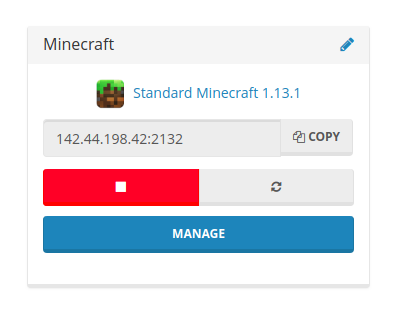
15. Copy your server’s IP address and open Minecraft (ensure you load the same version your server runs).
16. Go to “Multiplayer,” select “Add Server,” and paste in your IP address. You can name it wherever you wish—this name only appears for you.
You’ve successfully set up your Minecraft server and are ready to play!
Summary:
- Get a Minecraft server from Scalacube
- Install a game server on the Control panel > Gameservers > Install page
- Click Start to start the server
- Copy your IP address and use it to join your server