How to make a flying machine in Minecraft
Make Your Own Minecraft Server For Free
Your own Minecraft server is only 5 minutes away! We support simple one click install for over 1000 unique modpacks.
Free Minecraft Server Hosting

The Magic Behind Minecraft's Flying Machines
Minecraft goes beyond being just a game; it's a playground for creativity. The core elements that make flying machines possible are the Observer Block, Pistons, and the incredibly bouncy Slime Block. These aren't just ordinary blocks; they're the building blocks of your airborne dreams. The Observer Block, with its watchful eye, triggers actions when changes occur in its line of sight. Pistons, the mighty movers, push and pull with a force that can move mountains—or at least the blocks you need for your flying machine. And the Slime Block? Your dreams are held together by this adhesive, making sure that all parts move in unison. Picture blending this with a touch of imagination; the result is not just a tool but a work of art that can challenge the rules of Minecraft physics. The beauty lies not in the complexity but in the symphony of simplicity and ingenuity. Let's harness these basic principles and craft something extraordinary.Gathering Your Toolbox
Before embarking on this engineering feat, let's stock up on the essentials. You will need 4 Slime Blocks, 2 Observer Blocks, 1 Sticky Piston, 1 regular Piston, and some kind of building blocks—cobblestone or dirt, for example, really, any will do. Look at it like collecting ingredients for some recipe; each one will finally have its most important part in the dish. Finding these items is an adventure. Dig deep into the bowels of the earth for Redstone, hunt down slimes in the murky depths of swamps for slime balls, and craft your way to the Observer and Piston. This preparatory phase is where patience meets excitement. As you gather each item, imagine the possibilities, the trials, and errors, and the eventual triumph. With your toolbox ready, you're not just prepared; you're poised for greatness. Let the building begin.Step-by-Step Guide to Your First Flight
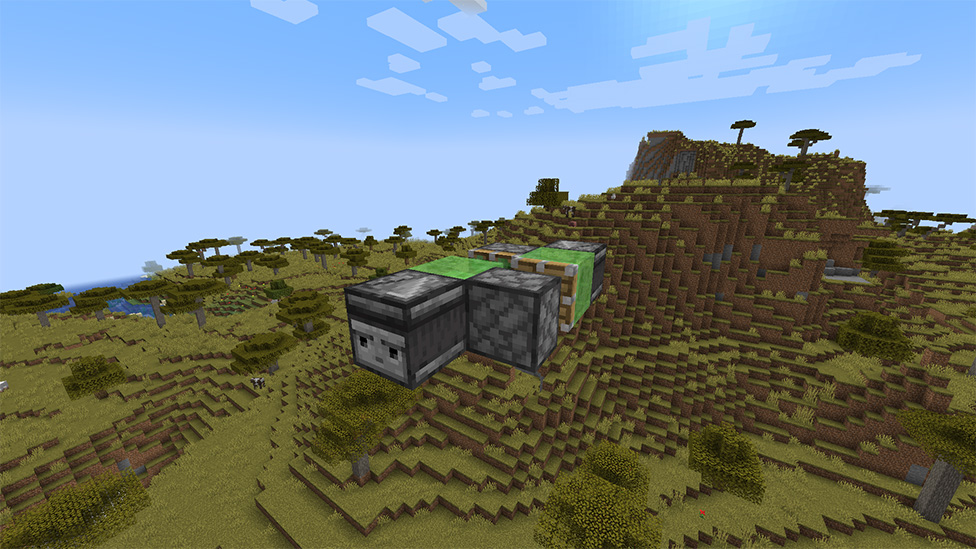
Building your first flying machine is akin to taking your first steps; it's a milestone. Start with a solid base—a pillar of your choice, tall enough to soar above obstacles. Place your Observer Block facing away from your intended flight direction; it's the lookout, after all. Directly opposite, install your Piston, ready to push you towards the horizon.
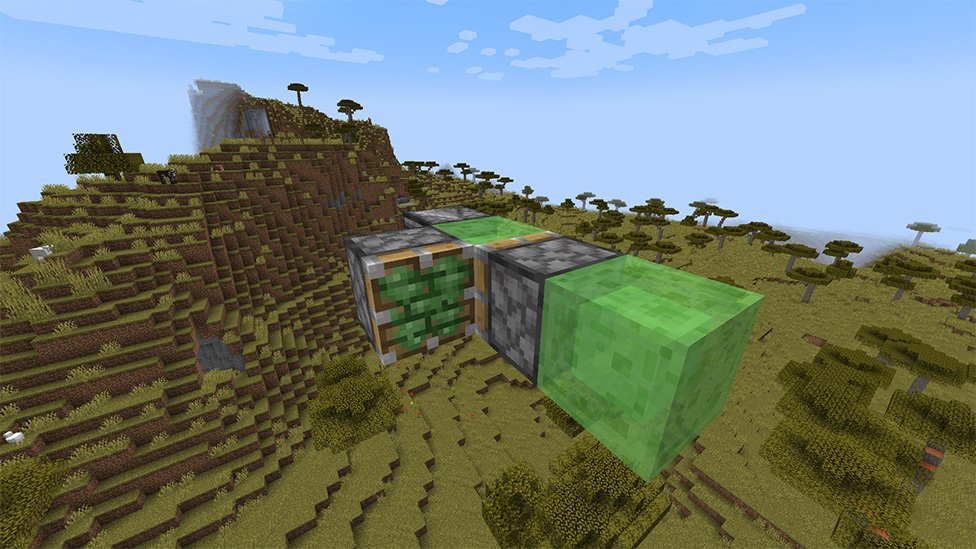
Next, bring in the Slime Blocks. Position two in front of your setup, ensuring they're snug against your Piston and Observer Block. These are your wings, your means of propulsion. Turn around, and it's time for the second Observer Block and your Sticky Piston. The placement here is crucial; it's the heartbeat of your machine, ensuring continuous motion.
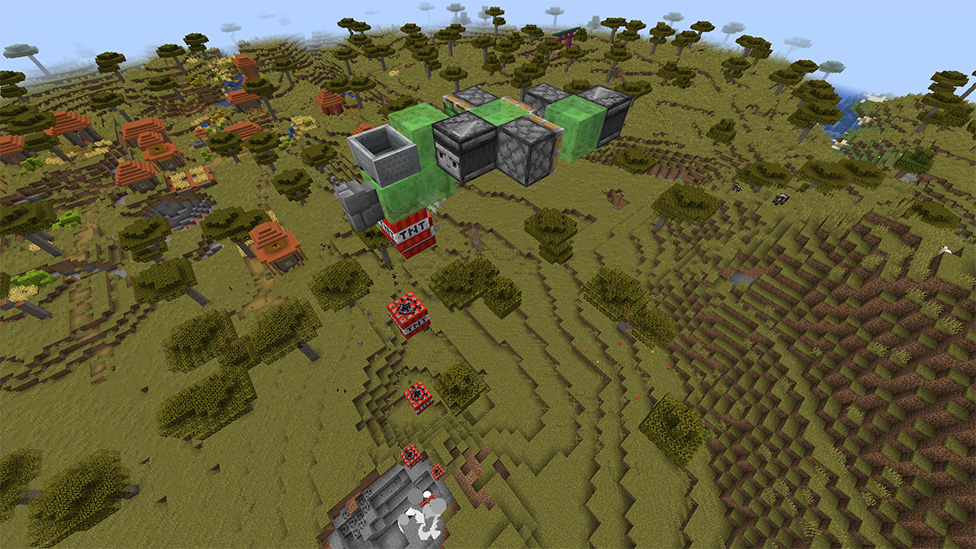
Now, the magic touch—trapdoors. Placing one in front of the first Observer Block is like turning the key in the ignition of your car. The machine springs to life, and suddenly, you're not just standing on solid ground; you're gliding above it.
As you watch your creation take its first flight, remember, this is just the beginning. Each block placed, each step taken, is a learning curve. Ensure that you embrace the failures as much as the successes. This will make sure that you are a better aircraft builder!
Taking It to the Next Level
Your first flying machine is just the draft of your masterpiece. Now, it's time to edit, to refine, to embellish. Think bigger. Why settle for a basic model when you can add passenger seats, or even a cockpit? Experiment with design and functionality. Add more Slime Blocks for stability or incorporate Redstone Blocks to power additional Pistons. Your creation can be as simple or as complex as you desire; the only limit is your imagination.
Remember, each modification is a step towards your ultimate flying machine. With every tweak, you learn a little more about the mechanics of Minecraft and the boundless possibilities it offers. So, tinker away. Turn your flying machine into a symbol of your ingenuity and creativity.
Final thoughts
The sky's no longer the limit in Minecraft, thanks to your new flying machine. But why stop there? Expand your horizons further by creating your own Minecraft server. It's a world where your flying machines can soar higher, and your adventures can go beyond the clouds. It's a world where your flying machines reach and go higher than they ever have before, where adventures soar beyond the clouds. Learn how to create a Minecraft server with Scalacube today.FAQs
How do I make a flying machine in Minecraft?
Build a flying machine using observer blocks, pistons, and slime blocks that exploit the physics provided in Minecraft to provide aerial exploration.
What materials are required to build a flying machine in Minecraft?
You will be using Slime Blocks, Observer Blocks, a Sticky Piston, a normal Piston, and some of the usual building blocks, which may be, for example, cobblestone or dirt.
How do you build a flying machine step by step?
Start off with a solid foundation, place Observer Blocks and Pistons appropriately, put in Slime Blocks for propulsion, and add trapdoors for activation.
How would I be able to make my flying machine better in Minecraft?
Play with the design changes: passenger seating, a Redstone Block power unit, or a larger structure for stability and function.
Make Your Own Minecraft Server For Free
Your own Minecraft server is only 5 minutes away! We support simple one click install for over 1000 unique modpacks.
Start Your Server For Free!
Copyright 2019-2026 © ScalaCube - All Rights Reserved.