Hollow Knight Silksong The Slab Guide
Few areas in Hollow Knight Silksong are as odd and unsettling as The Slab. Hidden deep behind tiers of quests and enigmatic requirements, this complex of prisons strips Hornet of her ability and makes you fight, climb, and sneak through to get out. Anyone who ends up in this facility unwittingly will be perplexed, both by the dreamlike mechanics and by the unsettling sight of Hornet without her customary gear. If you've ever been curious about how to enter this hidden area or how to survive once inside, this guide will walk you through every stage, from the initial takeover that gets things going to the brutal battling at the end.
How to Unlock The Slab Silksong
Make Your Own game Server
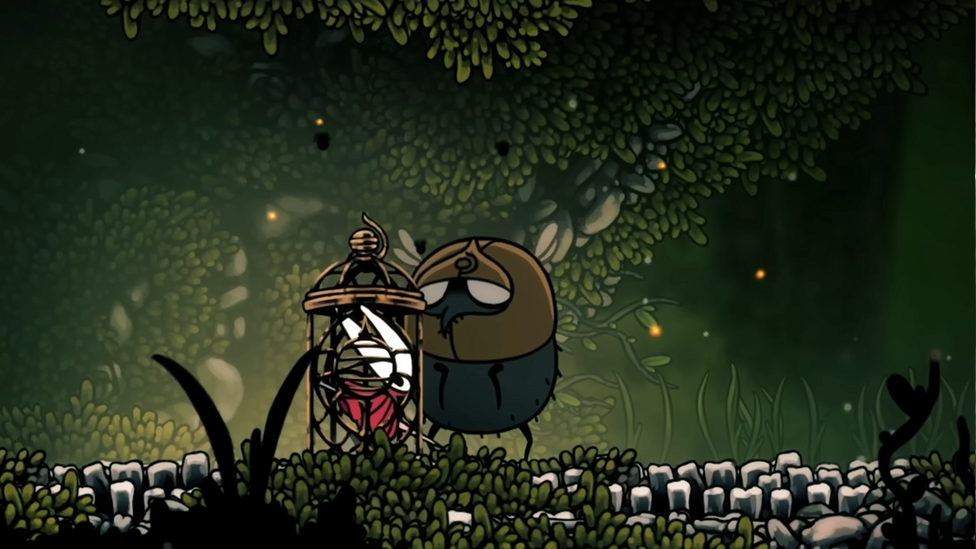
To be able to access The Slab, you will need to advance through the questline of Flea Caravan slightly. Escort the caravan to Greymoor, piling up more fleas to make them go around. You would have defeated the Moorwing by now if you haven't already, and do not forget releasing the thief at the Deep Docks, as his release is tied to future triggers. After those events, a new breed of enemy starts showing up everywhere in the world. These giant fly-like creatures walk around with heavy armor and cages being pulled behind them. One is always patrolling close to the newly empty location where the caravan camped by Greymoor. Instead of dispatching this abductor, have it abduct Hornet. She will be tied up in silk, locked within the cage, and the screen goes black. When vision returns, you’ll be inside The Slab, stripped of everything.
Awakening in Captivity
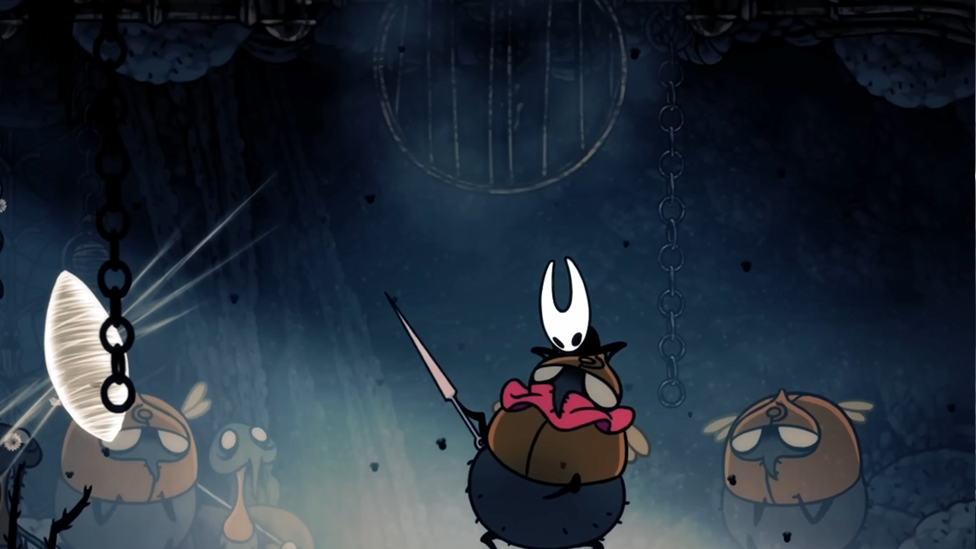
Hornet begins her trial by breaking out of her cell, but things are not well for her: her needle has been stolen, her cloak has been removed, and her abilities are severely disabled. You still retain the dash and wall cling, but combat can only be achieved with sadistic punches, without floating or tool use. The vulnerability that you now endure is deliberate. The Slab is designed to test your ingenuity. The doors are usually locked at first. Head left and down from the main cell block. There is a sealed door here, but the ceiling above the door is broken. Shatter it to begin your escape. Here you'll see the actual thieves who've swiped your equipment. Move through them into the bitter outside. The air here is sharp, so you'd be wise to hurry. Move through the first open door to the right to access indoors again, where weak guards roam. They can be taken out with your fists, but you're more interested in traps and ambushes deeper in.
The Key of Indolent
Descend from there until you get to Grindle, who is imprisoned in a room behind a door. You will need to free him to go further, even if he's not very chatty. Past him is a pressure plate and spike trap gauntlet. Sprint across before the floor collapses. At the end of the hall, you’ll find a key suspended on a chain. Grabbing it triggers an ambush; waves of enemies pour in, though their patterns are simple enough to dodge. Once clear, you’ll claim the Key of Indolent. Just ahead lies the Door of Indolent, which opens with your new prize, unlocking another section of The Slab.
Back through the door, Grindle returns, still obstinate, but at least there's a bench to rest on. Rest, and demolish the destruction in the ceiling of the previous room to find a shortcut. Push to the left here to let off a flea and back to the right to discover a second Door of Indolent. Beware, standing on the final pressure plate here blocks off the exits and summons a horde of enemies. Use the traps to your advantage by luring enemies onto them, clearing groups with minimal effort. Enemy-free, begin ascending the shaft ahead of you.
Searching the Tower
This climb is hazardous. Spikes line the walls, and accurate dashes and wall jumps are required to get through them. Halfway up, find a small alcove to your left. The breakthrough leads to a secret tunnel that holds Shell Shards, a worn Rosary String, and a shortcut back to the hub room. Work your way back up to the surface, where large pressure plates stick out from the walls. Try to step carefully, since each plate will trigger spikes or falling platforms. Once you finally find yourself back outside, the cold bites you sharply.
Freezing Passage
Outside, Hornet freezes rapidly. Try to get it between one burning coal brazier and the next, which are sanctuaries. Sprint left along the spike traps from the first fire to the second. Cover forward, near the bottom path, so the well-armed guards patrolling above won't be able to reach you. These guards deal tremendous damage, so treat them as hazards rather than enemies. Time your dashes to bypass their patrols, always keeping the next fire in sight. Eventually, you’ll reach a loading zone that offers relief from the cold. Descending further, you’ll discover another bench, a critical checkpoint before the next section. To the right lies a storage chamber where Hornet’s stolen cloak and needle are kept.
Recapturing Your Gear – The Heretic's Key
Hornet ambuses the guard in the cloak, quickly recapturing her stolen abilities. The relief is short-lived, though, as armored flies swamp the room. Small enemies perish instantly, but larger enemies use powerful ground slams and debilitating attacks that pay off for reckless play. Stay back, ride out their windups, and counterattack with measured assaults. Once the chamber is cleared, you’ll obtain the Key of Heretic. With your gear restored, the prison transforms from a desperate scramble into a more traditional Silksong challenge. The only key still missing is the Key of Apostate, which lies elsewhere.
The Underbelly
Return to the central hub and unlock the floor with the Heretic key. This opens access to the Underbelly, a winding network of chained platforms and narrow tunnels. Here you’ll encounter basic guards again, but also plentiful traps. Follow the Bellway signs to discover a new station, though you’ll need 50 Rosaries to activate it. Other than the damage, Mount Fay's frozen area is the only other area of concern, but without a grapple, advancement here ceases. There is a bench within the tunnels where one may rest, and a flea awaits above for those possessing double jump. Ultimately, your journey leads to Bilewater, where the Key of Apostate is concealed.
The Key of Apostate in Bilewater
Bilewater is a large, vertical area full of deadly ambushes. Start by clearing the Bellway to acquire an important checkpoint. From there, ascend slowly, employing wall jumps and grapples to navigate through. Be careful for fake walls, one of which hides a secret bench that can avoid a tremendous amount of backtracking. Here, it is harder to fight. Bushy enemies pop up and are too fast to be trapped. Summon or projectile is priceless to whittle them down before they get near. Lastly, late in this level, you will have to fight against Groal the Great, a fat monster who casts bombs and attempts to pull you inside its body. His volleys are very long-range, and his hitbox is danger-prone if attacked at close range. The best way is patience: wait on his volleys, break out, then come in with projectiles or careful nail attacks. His phase two is soul-like first-game explosions, though these are fairly well telegraphed and leave him open afterwards. Defeating Groal rewards you with the Key of Apostate, completing the set at last.
Back to The Slab
With the Apostate key, return to The Slab and open the locked doors you can see everywhere. These open shortcuts, secret rooms, and lore information are inscribed on walls. There's a Memory Locket within one of the caves, and there's another with the Old Penitent, who appears if you play mandolin on his altar and speaks pieces of mysterious story. The highest Apostate door contains a spiked orb puzzle and a horizontal pressure plate, which must be pogo-jumped over to gain access to the highest point. This link requires timing precision, wall jump, then dive-kick in quick succession to land on the top ledge, where another Mask Shard awaits. Lower down, Heretic lock opens up into treasure rooms and finally the bottom-most room of all.
The First Penitent
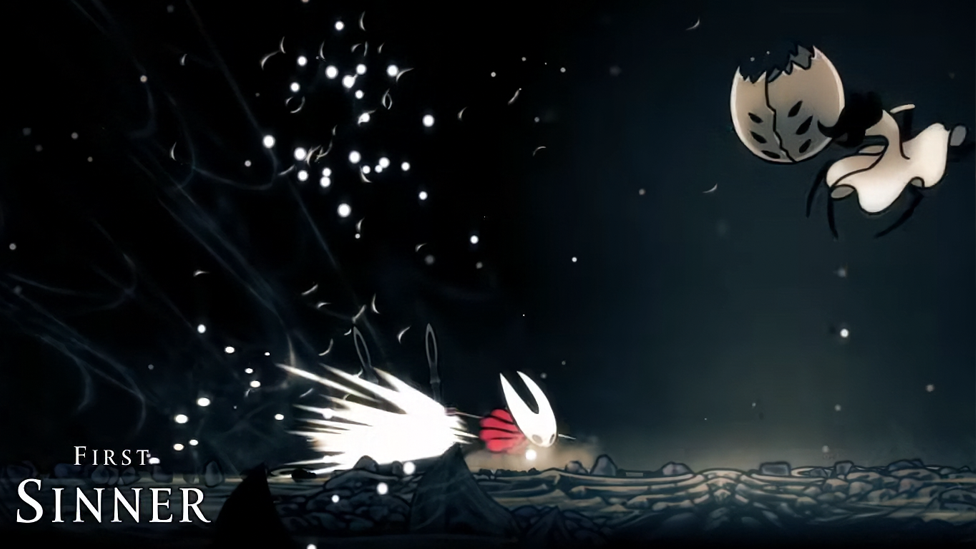
Below is a locked cage containing a Weaver statue inside. Releasing it initiates the fight with the First Sinner, which is one of The Slab's hardest fights. Like the Dream Bosses from the original, losing these boots kicks you out without killing you, and you are sent your way again to try again.
The First Sinner is ridiculously fast, slamming needle and bind animations in Shockcast. Jumping away is always the best, as nearly everything she can do on the ground doesn't hit Hornet in mid-air. Cut her off whenever she attempts to bind, as that opens up opportunities while taking away massive follow-up attacks. In the second stage, she covers the arena with explosive circles. Survival has to come with restraint: wait for dodging until the threat is over, then punish when she goes back to her attacking routines. The fight is slow, but with patience and precision, she is finally defeated. Binding with the defeated Penitent unlocks a sequence of light platforming challenges that test your grapple and double jump. At the end, you’ll be rewarded with a new Silk Skill, marking the completion of The Slab.
Conclusion
The Slab is more of a test of endurance and less of a norms space. From Hornet, having lost everything, to a fight with the First Sinner, it puts players in situations of vulnerability, puzzle-solving, discovery, and skill with tools. Its creepy atmosphere, added to by the incarceration of Hornet and the Penitents' enigmatic past, makes it one of Silksong's most unforgettable spaces. By conquering its trials and securing its treasures, you’ll not only emerge with powerful upgrades but also with a deeper understanding of the world’s darkest corners. The Slab is a place of punishment, but for the persistent, it becomes a crucible that forges Hornet stronger than ever.