How to Spawn Zombies 7 Days to Die
In the massive, apocalyptic sandbox that is 7 Days to Die, players constantly have to deal with threats from never-ending zombie hordes. However, the game gives tools and systems to those who want to tweak their experience, like the ability to spawn zombies wherever they want.
How to spawn zombies in 7 Days to Die is not a cheat; it’s an opportunity to change the game, see how the game plays with certain conditions, put up defenses, or make your challenges. Starting from the basics of Zombie Spawning to Advanced usage of the game’s Debug Tools and console commands, this guide will explain everything you need to know.

Zombie Spawning Mechanics
In 7 Days to Die, zombie spawning is connected to many in-game mechanics. The game makes extensive use of a heatmap system, a new gimmick that detects zombie activity degrees based on particular player actions. Spawning zombies nearby is increased from actions such as operating forges, cooking, crafting items, or building large structures that generate 'heat.' The heatmap makes for a dynamic experience where your actions dictate the environment, and you never know what will change next, but you never stop being on edge and having to keep your wits about you.
The spawning distances in the game are all finely tuned. Typically, zombies in 7 Days to Die spawn 45 to 100 blocks from the player’s location. They keep the player from being immediately overwhelmed by them while they’re still a looming threat. The zombies get more and more advanced and tougher as you progress through the game. For example, Rotting Carcass zombies are slower early game, but Feral Wights and radiated zombies are harder late game.
Activating Debug Mode for Zombie Spawning
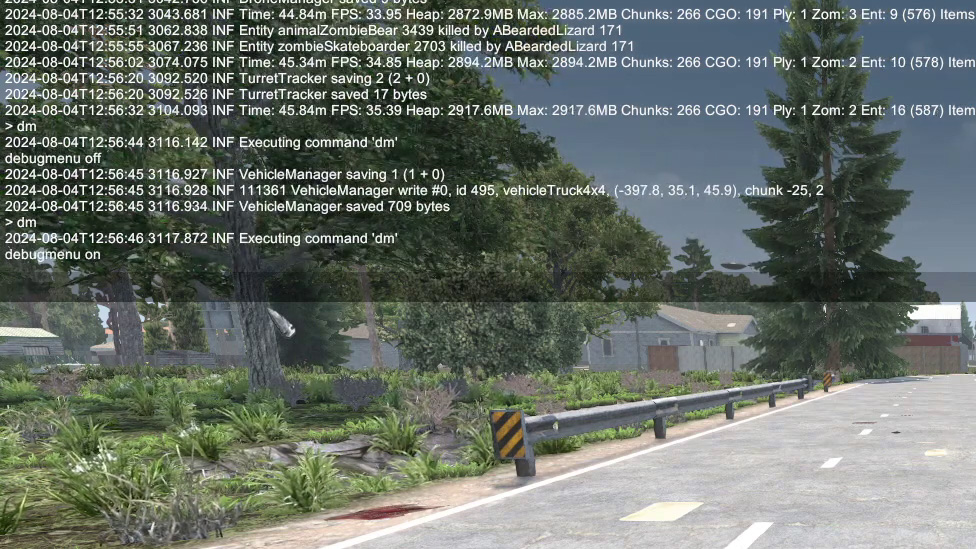
7 Days to Die’s Debug mode is a powerful little thing that offers players deep control over their game environment. To put the program in debug mode, open the console using F1, enter dm, and press Enter. Now that debug mode is in effect, close the console again by pressing F1 once more and then use the F6 key, which will open the zombie spawner menu.
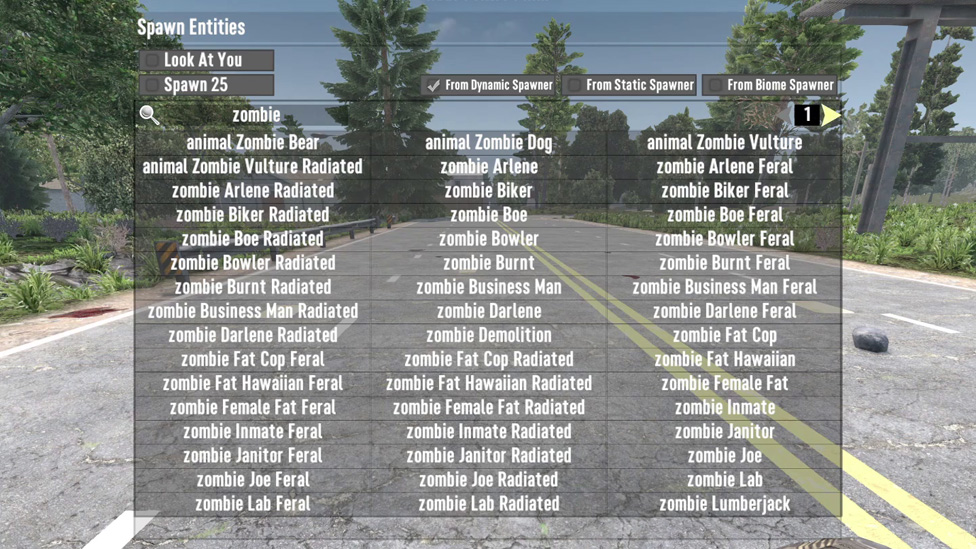
The zombie spawner menu is a tool capable of summoning almost every zombie in 7 Days to Die. From a dropdown menu you can select zombies such as the Zombie Biker or Burn Victim and spawn them directly at your crosshair. This feature is especially useful for testing a base defense or simulating a horde attack.
The menu also gives the option to spawn huge bunches of zombies at once. For example, the Spawn 25 feature in 7D2D is in the top left-hand part of the spawner menu. This function is what you can use to spawn 25 identical zombies and instantly create a horde. That said, it can be too much, so be sure to turn this off afterward (rather than accidentally mass-spawning).
Advanced spawning using Console Commands
Beyond debug mode, console commands offer another layer of control for zombie spawning in 7 Days to Die. The console command spawnentity allows players to summon zombies or other entities at particular locations. To use this command, type spawnentity <Player ID> <Entity ID> into the console, replacing the placeholders with appropriate values. The listentities console command produces an entity ID that will identify the Screamer or any other zombie using the entity ID.
The command spawnwanderinghorde spawns a mobile horde of zombies for players that want more chaotic challenges. The horde is active on the 7 Days to Die map, giving you a sense of unpredictability and thrill that is quite interesting. In addition, the command spawnscouts spawns smaller groups of zombies, which are intended to find and attack the player, bringing an extra layer of strategy to the survival gameplay of 7 Days to Die.
This is especially useful in 7D2D multiplayer or server environments where debugging options may be restricted since console commands can be used. These commands on the server allow server administrators to regulate or moderate the level of difficulty that all players will have in the game.
Types of Zombies You Can Spawn
The different variety of zombies in 7 Days to Die, is one of the best features of the game. These undead enemies fall into several categories, each with unique traits:
Enhancing Gameplay with Custom Zombie Spawning
Spawning zombies don’t have to feel like cheating. Instead, it can be a creative thing that helps 7 Days to Die gameplay. An example of this would be to test your traps, fortifications, and weapon setups over and over again by spawning hordes again and simulating an endless Blood Moon Horde scenario. Alternatively, a Screamer will attract nearby undead and spawn a chain reaction of zombie waves.
Role-players and streamers use custom spawns to create unique in-game narratives. Spawning zombies gives you an extra layer of depth whether you’re staging a desperate last stand against a massive horde or designing a challenging escape mission.
FAQ
Conclusion
Learning how to spawn zombies in 7 Days to Die unlocks unlimited gameplay customization. Debug tools and console commands allow players to fix difficulty, create custom scenarios, and shape their survival experience beyond all limits. With these tools, use them responsibly to help augment, not break, the core problem of the game.
ScalaCube is the top tier 7 Days to Die dedicated server hosting, offering smooth, reliable gameplay for zombie spawns, custom scenarios, and multiplayer. Low latency, high uptime servers for their servers, plus a customizable environment make them perfect for hosting immersive survival adventures with friends or testing elaborate in-game mechanics.
How to spawn zombies in 7 Days to Die is not a cheat; it’s an opportunity to change the game, see how the game plays with certain conditions, put up defenses, or make your challenges. Starting from the basics of Zombie Spawning to Advanced usage of the game’s Debug Tools and console commands, this guide will explain everything you need to know.

Make Your Own game Server
Zombie Spawning Mechanics
In 7 Days to Die, zombie spawning is connected to many in-game mechanics. The game makes extensive use of a heatmap system, a new gimmick that detects zombie activity degrees based on particular player actions. Spawning zombies nearby is increased from actions such as operating forges, cooking, crafting items, or building large structures that generate 'heat.' The heatmap makes for a dynamic experience where your actions dictate the environment, and you never know what will change next, but you never stop being on edge and having to keep your wits about you.The spawning distances in the game are all finely tuned. Typically, zombies in 7 Days to Die spawn 45 to 100 blocks from the player’s location. They keep the player from being immediately overwhelmed by them while they’re still a looming threat. The zombies get more and more advanced and tougher as you progress through the game. For example, Rotting Carcass zombies are slower early game, but Feral Wights and radiated zombies are harder late game.
Activating Debug Mode for Zombie Spawning
7 Days to Die’s Debug mode is a powerful little thing that offers players deep control over their game environment. To put the program in debug mode, open the console using F1, enter dm, and press Enter. Now that debug mode is in effect, close the console again by pressing F1 once more and then use the F6 key, which will open the zombie spawner menu.The zombie spawner menu is a tool capable of summoning almost every zombie in 7 Days to Die. From a dropdown menu you can select zombies such as the Zombie Biker or Burn Victim and spawn them directly at your crosshair. This feature is especially useful for testing a base defense or simulating a horde attack.
The menu also gives the option to spawn huge bunches of zombies at once. For example, the Spawn 25 feature in 7D2D is in the top left-hand part of the spawner menu. This function is what you can use to spawn 25 identical zombies and instantly create a horde. That said, it can be too much, so be sure to turn this off afterward (rather than accidentally mass-spawning).
Advanced spawning using Console Commands
Beyond debug mode, console commands offer another layer of control for zombie spawning in 7 Days to Die. The console command spawnentity allows players to summon zombies or other entities at particular locations. To use this command, type spawnentity <Player ID> <Entity ID> into the console, replacing the placeholders with appropriate values. The listentities console command produces an entity ID that will identify the Screamer or any other zombie using the entity ID.The command spawnwanderinghorde spawns a mobile horde of zombies for players that want more chaotic challenges. The horde is active on the 7 Days to Die map, giving you a sense of unpredictability and thrill that is quite interesting. In addition, the command spawnscouts spawns smaller groups of zombies, which are intended to find and attack the player, bringing an extra layer of strategy to the survival gameplay of 7 Days to Die.
This is especially useful in 7D2D multiplayer or server environments where debugging options may be restricted since console commands can be used. These commands on the server allow server administrators to regulate or moderate the level of difficulty that all players will have in the game.
Types of Zombies You Can Spawn
The different variety of zombies in 7 Days to Die, is one of the best features of the game. These undead enemies fall into several categories, each with unique traits:- Standard Zombies: Rotting Carcass, Zombie Janitor, and Plagued Nurse are common enemies. Killing them is relatively easy, and they are pretty common in early game stages.
- Tough Zombies: The Frozen Lumberjack and Zombie Biker have a higher health pool and do heavy damage.
- Special Zombies: They have different abilities. For example, the Burn Victim will set players on fire, or the Screamer’s high-pitched wail will summon extra zombies. Feral Wights and Mutated Zombies are other examples that require strategy and a lot of firepower to defeat them.
Enhancing Gameplay with Custom Zombie Spawning
Spawning zombies don’t have to feel like cheating. Instead, it can be a creative thing that helps 7 Days to Die gameplay. An example of this would be to test your traps, fortifications, and weapon setups over and over again by spawning hordes again and simulating an endless Blood Moon Horde scenario. Alternatively, a Screamer will attract nearby undead and spawn a chain reaction of zombie waves.Role-players and streamers use custom spawns to create unique in-game narratives. Spawning zombies gives you an extra layer of depth whether you’re staging a desperate last stand against a massive horde or designing a challenging escape mission.
FAQ
How to spawn zombies in 7 days to die?
Use F1 and dm to activate debug mode, press F6 to open the spawner menu, or use commands like spawnentity.
What does the heatmap system do?
It follows player actions like crafting or building, bumping up zombie spawns with rising heat, and introducing dynamic challenges.
Can you control zombie types spawned in?
The spawner menu and commands will allow you to summon specific zombie types (standard ones, freaky ones like the Screamer).
What makes Blood Moon events different?
Relentless zombie waves in Blood Moon events test your defenses and your survival strategies.
Conclusion
Learning how to spawn zombies in 7 Days to Die unlocks unlimited gameplay customization. Debug tools and console commands allow players to fix difficulty, create custom scenarios, and shape their survival experience beyond all limits. With these tools, use them responsibly to help augment, not break, the core problem of the game.ScalaCube is the top tier 7 Days to Die dedicated server hosting, offering smooth, reliable gameplay for zombie spawns, custom scenarios, and multiplayer. Low latency, high uptime servers for their servers, plus a customizable environment make them perfect for hosting immersive survival adventures with friends or testing elaborate in-game mechanics.