Available Dedicated Servers
- {{tariff.displayRam}} RAM
- {{tariff.displayCpu}} CPU
- {{tariff.displayDisk}} Storage
- {{tariff.displayBandwidth}} Bandwidth
* {{getDiscountFromTariffs(true)}}% OFF for the first month
* excl. VAT
Dedicated Server Hosting With ScalaCube
Setting up online services isn't always straightforward. While some platforms offer managed environments, many solutions require you to handle hosting on your own.
This leaves many newcomers confused. Terms like "hosting," "servers," "VPS," and other technical jargon can quickly become overwhelming.
However, deploying your own online services is easier than it seems. Dedicated server hosting providers have transformed what was once a complicated process into something you can set up in just a few minutes.
What Is a Dedicated Server?
In pure terms, a dedicated server is a physical machine (or virtual machine) that provides a specific service to its users or clients.
For general dedicated server hosting, the server runs the applications or services you choose, this could include game servers, websites, databases, or other software. Anyone who needs access to your service connects directly to the server you’ve set up.
Dedicated server hosting is a popular solution because it gives you full control over your environment. You can customize the system’s settings, install any software you need, and configure the server to meet your exact requirements.
How Does Dedicated Server Hosting Work?
Dedicated server hosting is a lot like renting an apartment.
Instead of buying a physical server, you rent a virtual one. Providers like ScalaCube keep you up and running with regular maintenance, and you can rent servers as often as you wish.
You choose the size of the machine (measured in RAM and storage), and the hosting provider sets it up for you. In minutes, you can be running your own Minecraft server.
To keep it running and online, you pay a recurring hosting fee. This ensures your server is constantly running and accessible to the world.
Why Should You Use Dedicated Server Hosting?
The answer to this question is really quite simple—because it’s flexible, powerful, and cost-effective.
For one, you can customize your game to your personal preferences. You can also make it more secure, thanks to the advanced firewalling protection that dedicated hosting provides.
Additionally, dedicated hosting provides a great game experience, as you can specify the amount of RAM, storage, CPU, and other hardware resources to your exact specifications.
Why Are Dedicated Servers Best for Multiplayer?
Dedicated servers are the best way to host multiplayer games or online services because they provide the customization and control that other solutions lack.
Shared hosting services are often less expensive, but you’re limited by the environment and restrictions set by the hosting provider. You won’t get the same level of control or ability to tailor your setup to your needs.
Ultimately, dedicated server hosting is the most reliable, powerful, and customizable way to host multiplayer games or online applications. It’s an accessible and flexible solution for users of all experience levels and budgets.
How to Host a Dedicated Server
-
Visit our hosting page and click "Sign Up" in the top right corner. Here, you can sign up (or login).
-
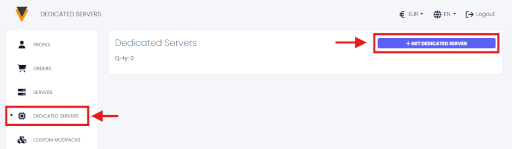
On the “Dedicated Servers” page, click “Buy Server.”
-
Then click ”Next.”
-
Select a location with available dedicated servers. You can see all available locations on the top of this page.
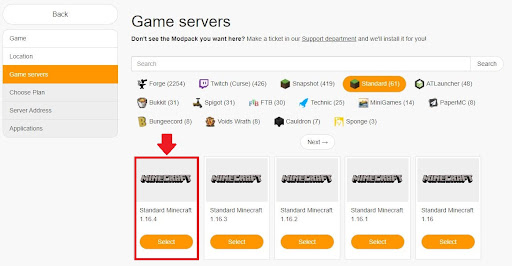
-
Choose a Minecraft version. You can change it later.
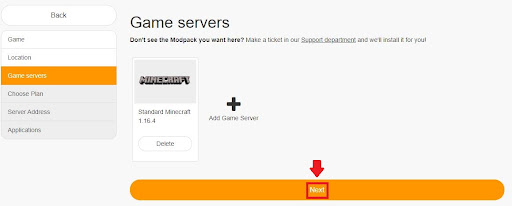
-
Press ”Next.”
-
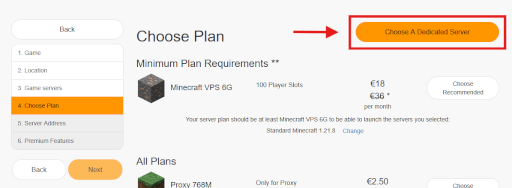
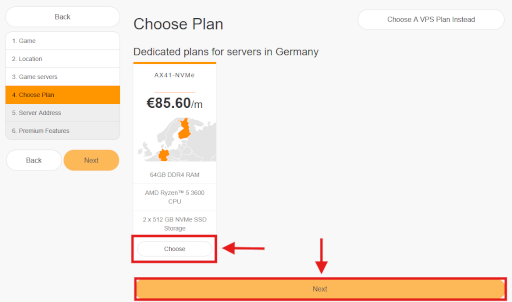
Click ”Choose a dedicated Server.”
-
Depending on you needed performance, choose your server plan. Then click ”Next.”
-
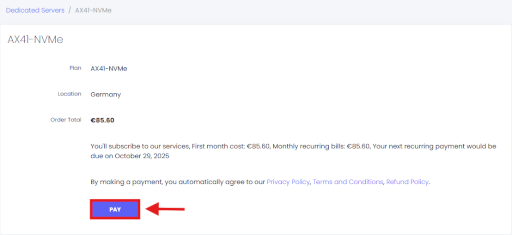
Click "Pay."
-
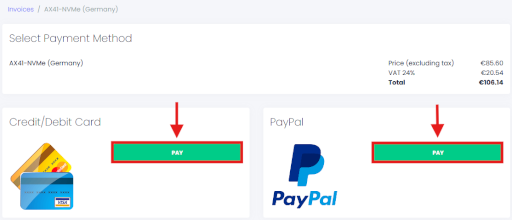
Make your payment and complete your order.
-
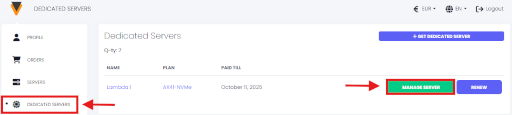
Click on “Dedicated Servers” and then “Manage Server.”
-
Install your preferred Operating System and copy your server's IP address. You can access it via SSH


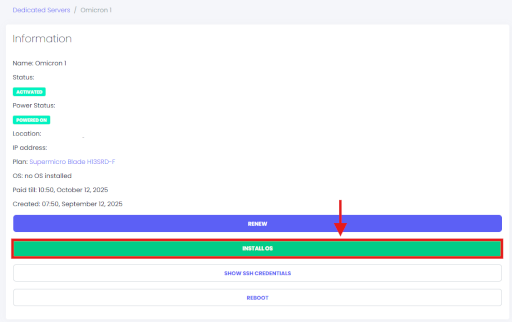
You’ve successfully set up your Dedicated server!.
Copyright 2019-2026 © ScalaCube - All Rights Reserved.