How to Build Spiked Walls in Sons of the Forest

Make Your Own The Forest 2: Sons of the Forest Server
Your own The Forest 2: Sons of the Forest server is only 5 minutes away!
Start Your The Forest 2: Sons of the Forest Server Today!
Why Spiked Walls Are Important
Appropriately spiked walls will provide a daunting obstacle to most wildlife and hostile creatures. It's the physical protection they afford, but also, more importantly, the deterrent effect that will make your base much less appealing to threats. Here are the key benefits:Physical Barrier: Make it difficult for enemies to rush into your base.
Deterrent Effect: Discourages attacks by making the infringement of your defences more difficult.
Versatility: It can be complemented with other defensive structures for increased security.
Gathering Materials for Spiked Walls
Essential MaterialsMaterials Needed for Spiked Walls: To construct spiked walls, you will need the following materials:
Wood Logs: These are obtained from the felling of trees.
Rocks: Collected from the ground or quarried from larger boulders.
Wood sticks: They are collected from bushes and small trees.
Rope: Can be discovered in caves, near campsites, or manufactured from cloth.
Tools Required
Axe: For chopping down trees and gathering wood.Pickaxe: For mining rocks.
Crafting Tools: Basic tools for assembling the wall components.

Step-by-Step Guide to Building Spiked Walls
Step 1: Gather MaterialsStart with gathering the following items. Chopping trees yields wooden logs, rocks from the ground, and sticks. Then, find/craft rope.
Step 2: Choose the Location
Choose a perfect area near your main base for building the spiked wall, perhaps in positions that are frequently hit or where a hole in your defences exists.
Step 3: Lay the Foundation
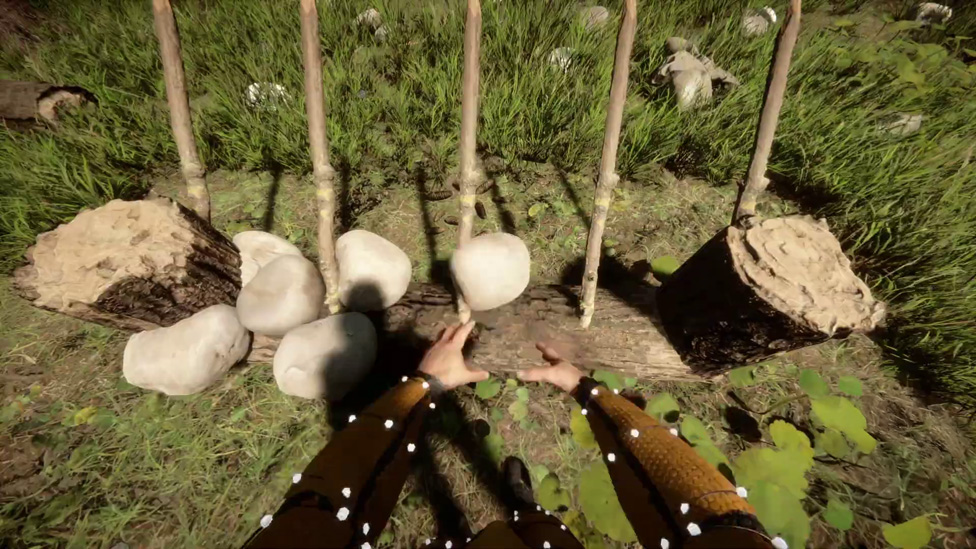
Lay down the base with rocks to give stability to your spiked wall. In such a way, make a wall that won't fall quickly due to the attacks.
Step 4: Construct the Wall
Place Wood Logs: The wood logs should be placed straight along the foundation. They should be evenly spaced and firm.
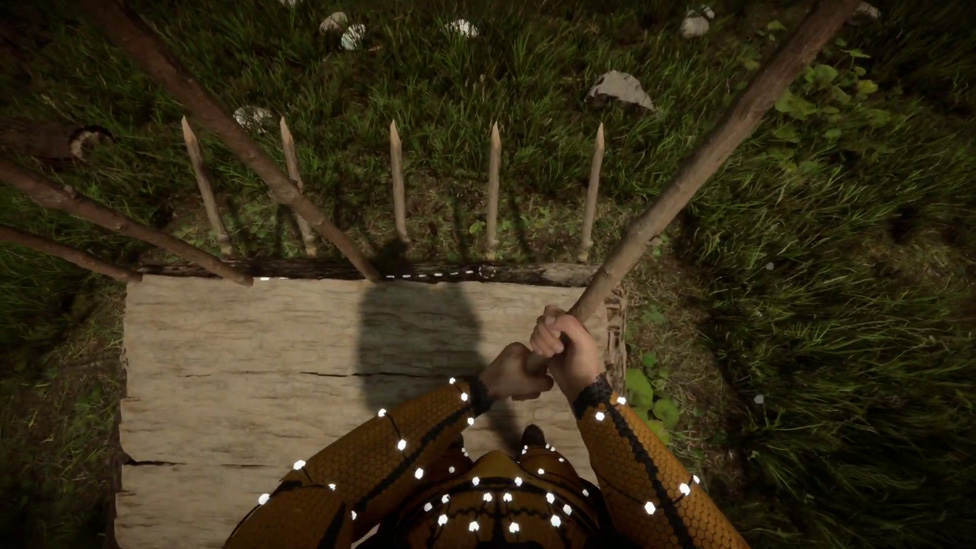
Put the spikes: Point and sharpen wood sticks and glue on the wood logs. This would create the spiked effect, making climbing over complex for enemies.
Tether using rope: Use the rope to tie the sticks firmly to the logs, hence increasing additional stability and making sure that the spikes remain in position.
Step 5: Reinforce the Structure
For more security, add layers to the spiked wall. Add more wood logs and spikes or mix them with different defensive constructions like a stone wall.
Advanced Tips for Building Spiked Walls
Combining with Stone WallsFirst, spike walls are used for extra defence, and then stone walls are used to back them up for maximum security. On their own, stone walls give a transparent, impenetrable barrier, while spiked walls offer additional defence from enemies trying to break through your defences.
Building Gates
Add gates into your spiked wall defences. The gates allow you to get in and out of your base, keeping out the more persistent creatures. Here is how you can build and secure a gate:Select the Gate Location: Pick a point in your spiked wall where you want to locate your gate.
Craft a Gate: A sturdily built gate from logs of wood held together with rope.
Install the Gate: Position the gate within the spiked wall and secure it with additional rope.
Add a Lock: Craft and attach a lock to the gate for added security.
Regular Maintenance
Regularly check and repair your spiked walls to ensure they remain effective. Over time, wear and tear can weaken your defences, so it’s important to perform routine maintenance.
What materials do I need to build spiked walls in Sons of the Forest?
Spiked walls need wood logs, rocks, sticks, and rope to be made. Those are things that a player may get by chopping down trees for their logs, collecting rocks, gathering sticks, and finding or crafting rope.
How do I enforce my spiked walls?
Back up those spiked walls with more layers of wood logs and spikes, or complement them with stone walls to increase their durability and possible self-defence applications.
Can I add gates to the spiked wall defences?
Yes, you can place gates in your spiked wall defence. You must create one with wooden logs and rope, then mount and lock it within your spiked wall.
Why is regular maintenance of spiked walls necessary?
Regular maintenance will keep your spiked walls very effective at their job. Their structure weakens with constant wear and tear, making it easier for enemies over time to breach your defences.
You cannot have a secure base without spiked walls in Sons of the Forest. The importance of this guide is to ensure you build sturdy and effective defences that will get your back covered from its myriad threats.
For the best gaming experience, consider our hosting servers here you can know how to make Sons of the Forest server services at ScalaCube. We provide top-tier server hosting to ensure smooth and uninterrupted gameplay. Join us now and elevate your gaming adventure!
Make Your Own The Forest 2: Sons of the Forest Server
Your own The Forest 2: Sons of the Forest server is only 5 minutes away!
Start Your The Forest 2: Sons of the Forest Server Today!