7 Days to Die How to Pick Up Workbench
The workbench is the key crafting station in 7 Days to Die, a popular survival game with crafting and exploration along with zombie hordes. When you have a poorly placed station you have to relocate, many of the players wonder how to pick up a workbench in 7 Days to Die. In this guide, we unwrap the mechanics, methods, and strategic considerations to move this important piece of your gameplay around to maximize its potential.
The Workbench and Its Role
One of the key parts of crafting advanced items and tools is the workbench in 7 Days to Die. This lets players queue multiple crafting recipes, saving 7D2D in-game time and inventory space. It serves as a tool to create vehicle parts, weapons, or other items essential for survival in 7 Days to Die's deadly environment. Because of its key role in base building and survival strategy, it’s important to understand how it’s placed and relocated.
Crafting or Finding a Workbench

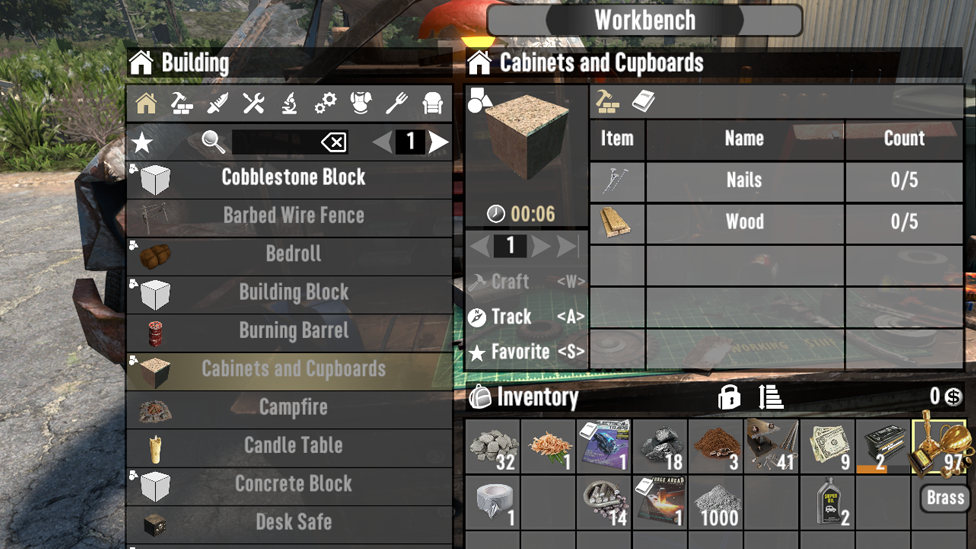
You will need to craft a workbench if you want one or if you find one in the game world. Crafting requires the following resources:
You can unlock the workbench recipe if you advance in the Advanced Engineering skill tree or if you find the right schematic. Instead, you may find preplaced workbenches in POIs, but these are non-movable unless the player builds them.
Mechanics of Picking Up a Workbench
Relocating a workbench in 7 Days to Die is tied to specific in-game conditions:
Ownership and Land Claim Block (LCB):
You can only pick up workbenches you place yourself.
Make sure the workbench is in the radius of your Land Claim Block. This block creates a place for you to manage your property, including moving workstations.
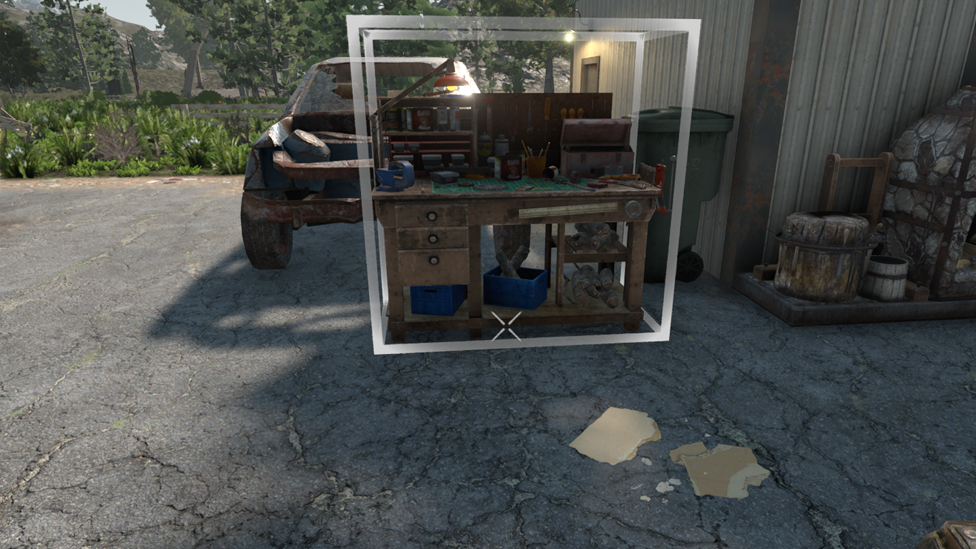
Interaction Key:
On PC version of 7 Days to Die, hold the E key next to the workbench and stand there. A radial menu will appear.
To start the pickup process, select the hand icon.
It gives you a timer; once the timer is up, the workbench is put into your inventory.
Crafted vs. Found Workbenches:
Picking up pre-existing workbenches in POIs is not allowed. You can only salvage these for resources with a wrench or pickaxe.
Troubleshooting: Workbench Pickup Common Issues
Some 7D2D players run into trouble while trying to move workbenches. If holding E only accesses the crafting menu instead of showing the pickup option, ensure the following:
If these conditions are true and the issue doesn’t go away, then verify game version compatibility, as mechanics may have changed between updates.
Workbench Placement and Relocation Strategic Tips
The placement of the workbench can have a big impact on how efficient 7D2D gameplay will be. Keep the following tips in mind:
Why Relocate a Workbench?
Relocation might become necessary due to various reasons:
Advanced Tips for Efficient Workbench Use
With a workbench in 7 Days to Die, queue multiple crafting tasks to maximize its utility so you can free your character up and do more things for it. Managing large items helps save inventory space and is important for repairing or upgrading tools and weapons to improve durability.
Collaborative crafting is facilitated in 7D2D multiplayer through a centrally placed workbench, which improves resource management and teamplay. For efficient gameplay and to help you survive in the game’s hard environment, a workbench is necessary to utilize properly in order to get the most out of it.
FAQs
Conclusion
If you want to thrive in the post-apocalyptic 7 Days to Die world, you need to master the placement and relocation of the workbench. Knowing the mechanics, writing good prerequisites, and knowing when and where to use this indispensable tool, players can maximize this tool and use it to their advantage. Planning and placement can save time, improve crafting efficiency and save your valuable resources from the undead. The workbench is the backbone of survival strategies, whether you create new tools or reorganize your base.
With Scalacube’s 7 Days to Die server hosting, you can enhance your 7 Days to Die multiplayer experience with reliable servers, customization of settings, and seamless gameplay.
The Workbench and Its Role
One of the key parts of crafting advanced items and tools is the workbench in 7 Days to Die. This lets players queue multiple crafting recipes, saving 7D2D in-game time and inventory space. It serves as a tool to create vehicle parts, weapons, or other items essential for survival in 7 Days to Die's deadly environment. Because of its key role in base building and survival strategy, it’s important to understand how it’s placed and relocated.Crafting or Finding a Workbench

Make Your Own 7 Days to Die Server
You will need to craft a workbench if you want one or if you find one in the game world. Crafting requires the following resources:
- Forged Iron (25): Forged or obtained from loot.
- Mechanical Parts (20): Taken from cars, office chairs, or appliances that have been disassembled.
- Wrench (1): A tool for resource salvaging.
- Claw Hammer (1): Very often forged at a forge or found in loot.
- Wood (50): Easily gathered from trees.
You can unlock the workbench recipe if you advance in the Advanced Engineering skill tree or if you find the right schematic. Instead, you may find preplaced workbenches in POIs, but these are non-movable unless the player builds them.
Mechanics of Picking Up a Workbench
Relocating a workbench in 7 Days to Die is tied to specific in-game conditions:Ownership and Land Claim Block (LCB):
You can only pick up workbenches you place yourself.Make sure the workbench is in the radius of your Land Claim Block. This block creates a place for you to manage your property, including moving workstations.
Interaction Key:
On PC version of 7 Days to Die, hold the E key next to the workbench and stand there. A radial menu will appear.To start the pickup process, select the hand icon.
It gives you a timer; once the timer is up, the workbench is put into your inventory.
Crafted vs. Found Workbenches:
Picking up pre-existing workbenches in POIs is not allowed. You can only salvage these for resources with a wrench or pickaxe.
Troubleshooting: Workbench Pickup Common Issues
Some 7D2D players run into trouble while trying to move workbenches. If holding E only accesses the crafting menu instead of showing the pickup option, ensure the following:- You placed the workbench and it is not a natural one.
- The workbench is in the Land Claim Block and it is active, covering the workbench.
- The workbench fits into the space you have in your inventory.
If these conditions are true and the issue doesn’t go away, then verify game version compatibility, as mechanics may have changed between updates.
Workbench Placement and Relocation Strategic Tips
The placement of the workbench can have a big impact on how efficient 7D2D gameplay will be. Keep the following tips in mind:- Centralized Location: Put your workbench close to other crafting stations for more efficient resource management.
- Secure Area: Make sure that it’s in a well-defended part of your base so that it won’t get damaged during zombie attacks.
- Close to Resources: Put it where you can easily access materials without having to transport them.
- Future Expansion: In addition, placing the workbench initially will consider how much potential base expansion is needed to reduce the need to relocate the workbench later.
Why Relocate a Workbench?
Relocation might become necessary due to various reasons:- Base Migration: Once you are on your way, you may become bigger than your initial base and move to a more strategic location.
- Space Optimization: Reorganizing your crafting area for better efficiency.
- Defensive Adjustments: Getting essential workstations out of the way to better-protected zones to avoid losing them during zombie waves.
Advanced Tips for Efficient Workbench Use
With a workbench in 7 Days to Die, queue multiple crafting tasks to maximize its utility so you can free your character up and do more things for it. Managing large items helps save inventory space and is important for repairing or upgrading tools and weapons to improve durability. Collaborative crafting is facilitated in 7D2D multiplayer through a centrally placed workbench, which improves resource management and teamplay. For efficient gameplay and to help you survive in the game’s hard environment, a workbench is necessary to utilize properly in order to get the most out of it.
FAQs
Can you get a naturally spawned workbench in 7 Days to Die?
You can’t pick up workbenches you didn’t place yourself. Static workbenches must be dismantled for resources found.
My workbench pickup option isn’t appearing, why?
Make sure it’s something placed by a player, within a Land Claim Block and you’re holding the interaction key.
What does it take to create a workbench?
To make a workbench, you’ll need forged Iron, mechanical parts, a wrench, a claw hammer, and wood.
How can I maximize the efficiency of my workbench?
You need to place it in the middle, secure it in your base, and use it for time-consuming craft tasks to increase the 7 Days to Die gameplay.
Conclusion
If you want to thrive in the post-apocalyptic 7 Days to Die world, you need to master the placement and relocation of the workbench. Knowing the mechanics, writing good prerequisites, and knowing when and where to use this indispensable tool, players can maximize this tool and use it to their advantage. Planning and placement can save time, improve crafting efficiency and save your valuable resources from the undead. The workbench is the backbone of survival strategies, whether you create new tools or reorganize your base.With Scalacube’s 7 Days to Die server hosting, you can enhance your 7 Days to Die multiplayer experience with reliable servers, customization of settings, and seamless gameplay.