How to Make a Map in Minecraft
Make Your Own Minecraft Server
Your own Minecraft server is only 5 minutes away! We support simple one click install for over 3298 unique modpacks.
Minecraft Server Hosting
How to Make a Map in Minecraft
Making maps gives a fun reward. Players can see how far they've come in their Game world. It helps them not get lost too. Every map is special. You see, it changes depending on what you've seen or built in the game.Gladly, it's possible for everyone to master the art of creating an elaborate map in Minecraft. All it takes are some easy steps!
Gathering Materials for Your Map
Essentials like paper and ink sacs are found in villages, dungeons, or you can make them! With these supplies, you're set to start crafting your map.Crafting Your Map
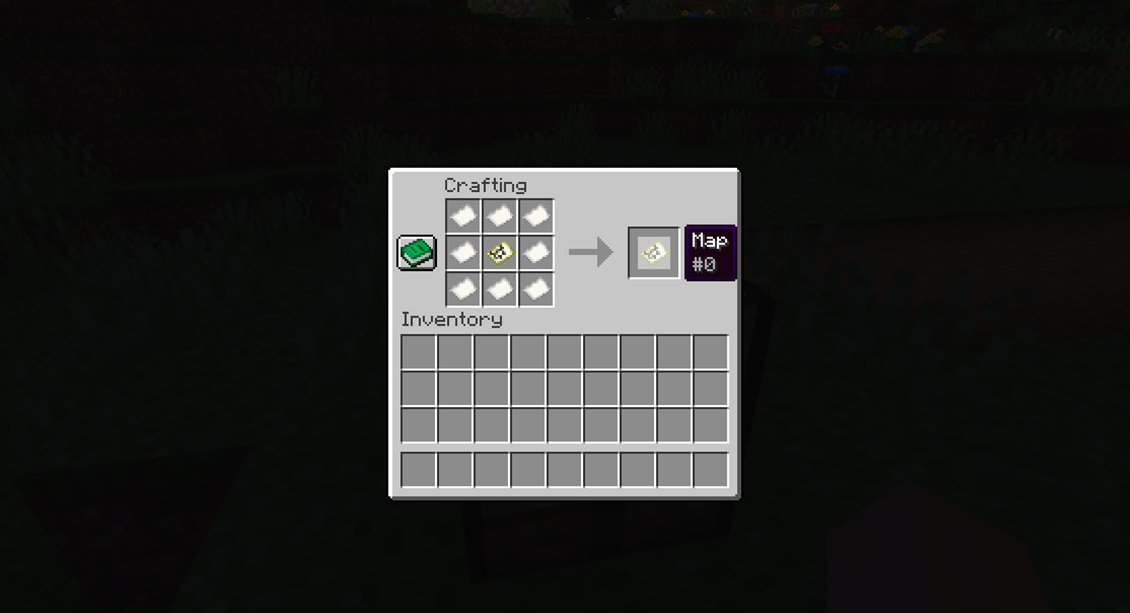
After you've collected everything you need, let's get started on making the map! There are just four easy steps to creating your own Map item:- Open up the Crafting Table menu and put an 8x8 square of paper in each slot except for the middle one;
- Grab some planks from either spruce or birch trees and place them into all 9 slots within the Crafting table menu;
- Equip your newly crafted Map item by dragging it onto your toolbar and selecting it as active item;
- Finally look at any block on ground while holding down right mouse button. After following these steps correctly, you should now have a fully functional Map that can help guide you through unknown lands!
TIP: Try modded Minecraft server instead. There might be some extra customization you would love!
Setting Up Your Map Room
One effective method is to design a space that is reachable and visible from every side. It lets you enjoy your masterpiece, while others can appreciate its splendor too.You could even create multiple rooms if you wanted!
Pick a place, then start creating walls with any blocks you like. These aren't forever, so try out various designs. Keep going until you discover a good fit for your goal.
Now comes the fun part - decorating!
Begin with placing tables and chairs along the room's perimeter. Next, incorporate things like paintings, banners, and sculptures. Position them inside or outside the room, based on the remaining space post wall completion.
Think about brightening the space with torches or blocks that glow. That way, those who visit can see clearly where to go inside your map room!
Once all is done, take a step back and admire your accomplishment - well done! A stunning map room is now ready for all to appreciate when they come in.
Inventory - When everything is sorted right, a clear map should surface at the base square of the 3x3 grid. Grab this piece and slide it into your inventory. Now, you'll start crafting your journey through Minecraft!

Setting Map Markers
When the map's done, it's marker placing time. Map markers, those unique signs, guide players and mark key spots on their maps. Here's your task:- Start by creating a compass. You'll need iron ingots and redstone dust for this. Don't forget the paper! Make it using three sugar cane or wool pieces.
- Start by getting all your materials together. Then make a fresh map. To do this, put the paper on a clear 2x2 crafting grid. Next, add the compass. This method will make a blank map.
- Simply put the unused map into a frame, like it's on a wall or post. This lets others see it. Hold a right-click on the frame until a marker shows up on your map.
- NBT tags help you tailor each marker. You can add names, colors, and unique textures! This lets viewers easily spot each spot on your map, no intense detail-checking needed.
Now that you know how to make and customize your own markers, go ahead and get creative! Try making different shapes or add more than one color per marker.
Markers are particularly useful when playing survival mode with friends since they allow everyone to easily keep track of key locations like home base or mining sites.
Frequently Asked Questions
What Other Materials Can I Use To Make A Map?
Having a compass may be necessary for measuring distances in your trip. It supports making your map as exact as it could be.
Think about using paper or parchment. It's a strong base for your map. You can add details to it later. Ink or dye is also useful. You can use it to record coordinates and other key travel details.
Take quartz blocks. They make roads look interesting. Then look at sandstone slabs. They're perfect for houses! These materials make it easy to create attractive unique maps. Now players can see their game worlds in a fresh way.
How to Make a Map Bigger In Minecraft?
Let's use several maps, each occupying its own wall spot. This gives a complete view of your world. No info overlaps or open areas get left out.
Plus, you can join these maps with redstone dust. It makes them blend more smoothly when you're moving about. This provides gamers a really detailed look at the area around them. It makes planning paths a lot simpler!
How Can I Make a Larger Map Wall?
First, locate the right spot on your server for building your map wall. Confirm ample space is available to prevent your map from being squished once it's complete.
Final Thoughts
Making a map in Minecraft can be a fun and creative way to explore the world. With so many options available, you can customize your map however you want it.You can use different materials like paper or maps from other games, make larger maps, build 3D maps and even customize markers for added detail and personalization. No matter what type of map you decide to make, there is sure to be something out there that will suit your needs.
Set up Minecraft server today!

Make Your Own Minecraft Server
Your own Minecraft server is only 5 minutes away! We support simple one click install for over 3298 unique modpacks.
Start Your Minecraft Server Today!