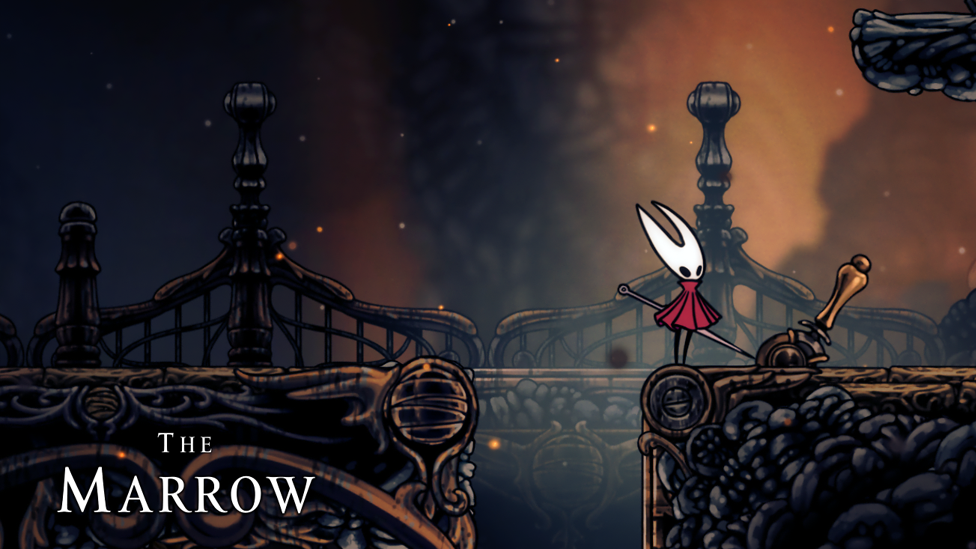
Hollow Knight Silksong The Marrow Full Guide
The Marrow is the second area for players to explore in Hollow Knight Silksong, and this may be the first section where you begin to feel some difficulty piling on. You can try to speed through your first run through of this area, or you can take your time and take part in the first side quest you will come across. Not only a side quest, but many items will be in this level that will be useful for your playthrough, like a tool to help you collect Shell Shards, and the ability to unlock fast-travel after defeating the Hollow Knight Silksong The Marrow Boss.
If you need help at this stage of the game, then this guide is perfect for you and will assist your experience. This is a full Hollow Knight Silksong The Marrow walkthrough, so have a read and jump into your game with the information you need to breeze through.
Beginning the journey in The Marrow
Make Your Own game Server
If you progress through the Bone Keep to the east, you will eventually be met with the title
screen of The Marrow. This area is a crazy looking area with bone platforms and lava all around
you.
When you are navigating The Marrow in Hollow Knight: Silksong, make sure to take note that
enemies will hit much harder than they did in the Moss Grotto, so be prepared for much harder
fights, with a harder world consisting of collapsing platforms, so you need to be speedy in some
areas!
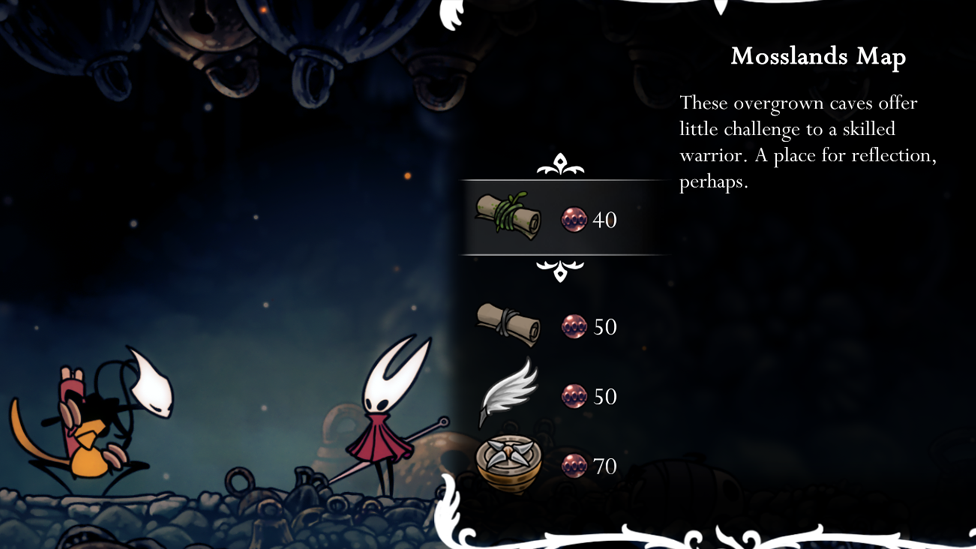
Find Shakra & Purchase a Map
When you first enter Marrow, you want to find Shakra so you can purchase a map for when you progress. Shakra is a very important NPC that provides maps for each area. To locate Shakra, you will need to head east of the beginning point while also jumping up. You will reach a platform that has two floating enemies and one crawling enemy. You should defeat these as you pass them quite easily.
Once you see the flying enemies, head past them to the west and up until you reach a room with spiked floors. Continue climbing until you find an opening in the ceiling, which will bring you into a darker room with floors that collapse.
To get to Shakra, you need to reach the top of this area until you can jump left onto a platform and go to the room on the left. No, just keep going left until you find Shakra at the end of the passage, and make sure you purchase a map of both the Moss Grotto and The Marrow while you are speaking to him. Also, if you can purchase a compass at this point, do so, as it will be a great help.
Introduction of the First Side Quest
The first quest begins in this area, so you have the opportunity to start this if you like. This is
called the Lost Fleas, and can be started by locating the Flea Caravan and speaking to an NPC,
which is on the east side of the map. To get to this location, backtrack from Shakra until you
reach the area with the collapsing platforms. Instead of going right to the bottom, jump on the
platform to the east that is clearly made of bones.
Follow this to the east past a room with rocks falling from the ceiling until you reach a pit that
you can drop down. After dropping down, the first left-hand turn will bring you to the Flea
Caravan. Speak to the NPC, Fleamaster Mooshka, twice, and begin the Lost Fleas side quest.
You will need to locate and guide a handful of fleas back to the caravan. Completing this task
can end up taking a while, so this is one to do throughout your gameplay while you explore.
Locating the Shard Pendant Tool
Introducing the Shard Pendant, a tool that brings the ability to collect more shell shards from defeated creatures. Luckily, this is hidden within the Marrow area, so you can collect it from here. Start from the Flea Caravan, and go back to the sign, and then go upwards, and take the left when you get to the top.
You will reach another room that has collapsing platforms, so this time, head to the left onto the platform with the giant skull enemy. Beware, you will have to either dodge or kill this massive enemy, so get ready for this. Once you have passed this creature, you will find the room containing the Shard Pendant to the left.
The Main Boss Location
The Bell Beast is the main boss of the Marrow in Hollow Knight: Silksong. This boss is found near Shakra, in the room above where he is hanging out. Feel free to check the map image attached for the Bell Beast's exact location, but just know there's a clear indicator that you're close. You will find a giant sign with three arrows pointing to the left, indicating the boss is in the following room. Unfortunately, you can't fight the Bell Beast immediately. Instead, you need to get a specific item in order to free it and activate the boss fight.
How To Start The Marrow Boss Fight
The main boss fight in Hollow Knight Silksong is the Bell Beast. To begin the fight, you need to destroy the webs that have captured it. Before destroying these webs, you will have to find the Silk Spear Skill, which is found in the northern section of Bone Bottom. If you are having difficulty finding this, head west from the location of the Bell Beast and head north. Keep going upward to a platform that holds an altar that can be interacted with. This gives you the Silk Spear Skill. Use this on the web to begin the battle. Beware, it will start right away and is much more difficult than the Moss Grotto boss fight.
What do I get from The Bell Beast?
Hollow Knight: Silksong's fast-travel system gives you the ability to travel quickly between areas. But you need to unlock the fast travel points in other areas to travel to them. After you have won the battle, you need to find the Deep Docks location by heading east from the Bell Beast
Exit The Marrow & Enter Deep Docks
After you have headed east of the Bell Beast boss fight, continue east and head down a level, and continue your way to the next room. In the next area, you need to keep going east until you find an opening in the floor that you can drop through. And eventually leading to a room with a bench in which you can heal and save, so if you need this, then definitely do this here. Below this, you will find a giant and a mini skull enemy on the lower platform. Once you see these, go east until you get to a lava section. The Deep Docks passageway is in the southeast of this section.