How to Upgrade Your Workbench in Valheim
How to Upgrade Your Workbench in Valheim
In valheim mp, the workbench is the primary crafting station that also serves as your central base for construction, repair, and even upgrading your equipment. So as you advance through the game you have to get a better workbench in order to make better weapons, tools, and armory. This guide gives you a run-down of how to upgrade workbench valheim successfully, the materials you will require, and general advice on how best to manage your workbench in order to be more viable in the second half of the game.Why Upgrade Your Workbench?
To get better gear, weapons, and armor you need to upgrade your workbench in the game. Each level opens up better equipment for crafting which is needed in order to deal with the increasingly difficult enemies and raids of new biome locations, such as Swamp, Mountain, and Plains. A higher-level valheim workbench also enables you to fix and improve complex tools while maintaining your tools and equipment in the best condition with no extra expenditure.Materials Needed to Upgrade the Workbench
Valheim upgrade workbench, you must have the necessary items needed for the Workbench. All upgrades are unique and earn the player more difficult crafting abilities. Here’s what you’ll need for each level: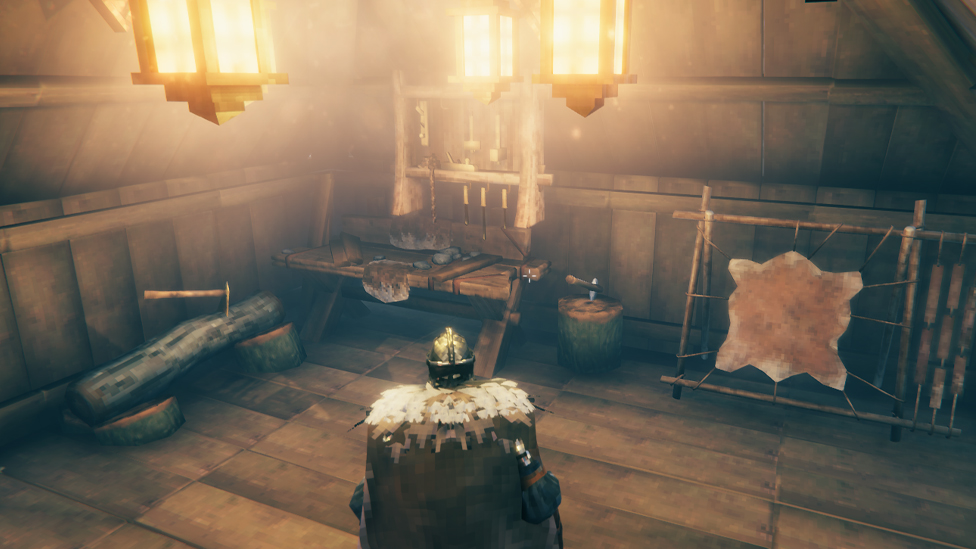
Make Your Own Valheim Server
- Workbench Level 2: Chopping Block (requires 10 Wood, 10 Flint)
- Workbench Level 3: Tanning Rack (requires 10 Wood, 15 Flint, 20 Leather Scraps, 5 Deer Hide)
- Workbench Level 4: Adze (requires 10 Fine Wood, 3 Bronze)
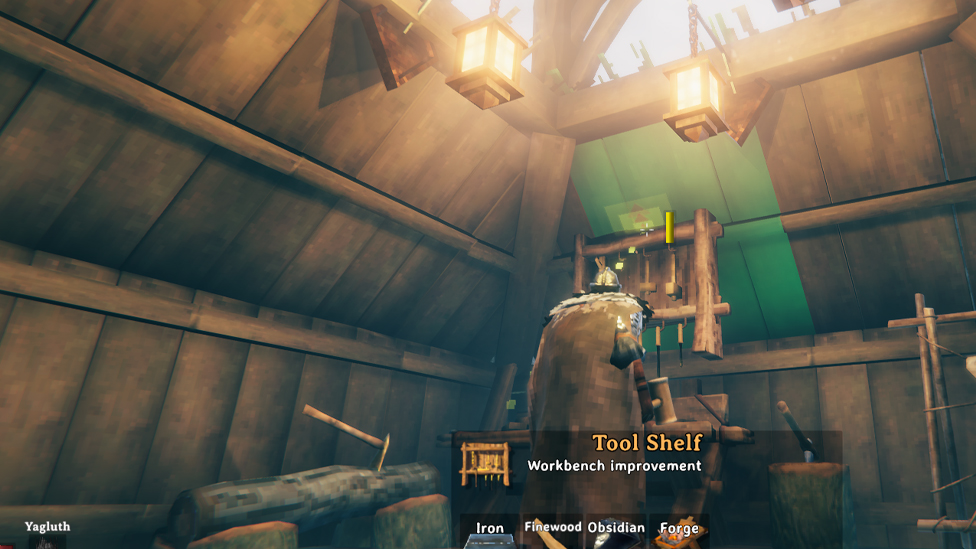
- Workbench Level 5: Tool Shelf (requires 4 Iron, 10 Fine Wood, 4 Obsidian).
Step-by-Step Guide to Upgrading the Workbench
Step 1: Crafting and Placing the Chopping Block
The first workbench improvement is called The Chopping Block and this one is not too difficult to craft once the flint is obtained.- Collect 10 pieces of wood by cutting trees.
- Get 10 pieces of Flint and they can be found in or near rivers and shores in the Meadows.
- Pull off the hammer menu and choose the option that says Chopping Block from the available crafting menu.
- Chopping block should be conveniently located in the vicinity of your workbench as it would be rather inconvenient to run across the room every time if you need to chop some things.
Step 2: Level 3: Tall Posts, Leg Levelers and Trays
The Tanning Rack takes longer preparatory work because it involves items from animals and other strips that can be found in the Meadows area.- Collect Wood and Flint: You must be able to find ten pieces of wood and fifteen pieces of flint. These are relatively easy to find from the Meadows region.
- Hunt Boars for Leather Scraps: Leather scraps fall from boars, and they are abundant in the Meadows. For that, you will need 20 scraps in total.
- Hunt Deer for Deer Hide: Deer can be found in the Meadows and the Black Forest.
Step 3: Crafting the Adze
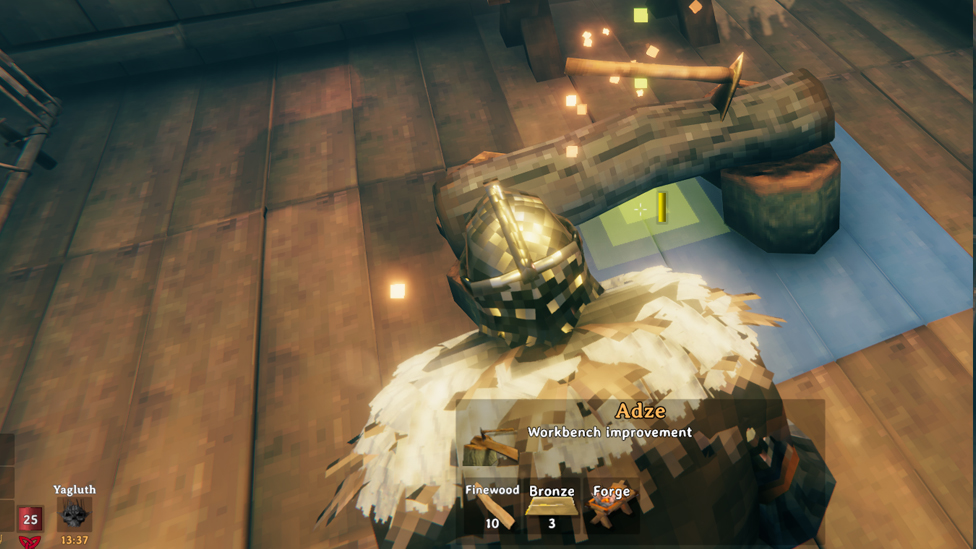
The Adze is used to create materials from the Black Forest, and therefore only usable after you have gotten to an advanced level in the game.
- Gather Fine Wood: To acquire fine wood cut down some of the birch trees found in the Meadows area. You’ll need 10 pieces.
- Craft Bronze: To get 3 bronze ingots, melt copper and tin ore which can be gathered in the Black Forest. To smelt and join these ores you will require a forge.
Step 4: Designing the Tool Shelf (Level 5)
The Tool Shelf is the last upgrade of the workbench. To craft it you will require materials from both the Mountain biome and the Swamp biome.- Collect Fine Wood: Harvest from the Meadows if you do not have 10 pieces of fine wood: chop a birch tree.
- Obtain Obsidian: Obtain obsidian in the Mountain biome only with an iron pickaxe. You’ll need 4 pieces.
- Find Iron: Scrap iron is located in the Swamp biome’s Sunken Crypts & other locations. In order to get 4 iron ingots, I smelted it down.
Tips for Maximizing Your Workbench Upgrades
1. Place All Upgrades in a Protected Area
Make sure your workbench and its upgrades are sheltered from the weather. Rain can damage exposed structures, making it harder to access and use your crafting stations. Building a roof over your workbench area is a simple fix that helps you use it anytime.2. Create a Centralized Crafting Area
Set up your workbench alongside other essential crafting stations, such as the valheim forge upgrade and kiln, to streamline crafting and repairs. Having everything in one place saves time and makes resource management easier.3. Hunt and Farm Regularly for Materials
Upgrading your workbench requires specific materials from biomes and animals, like deer hides and flint. Make a habit of gathering these resources when you’re exploring so that you’re ready to upgrade when the time comes.4. Plan for Future Upgrades
As Valheim continues to evolve, additional workbench levels may be added. Keep exploring and gathering resources to stay prepared for future updates.Use Fast Servers for Maximum Gaming Satisfaction
When playing Valheim, especially in multiplayer mode, you should get reliable and fast servers to guarantee an optimum gaming experience. Scalacube offers not just fast but also reliable servers that are lag-free and efficient.FAQs
What if I can’t find enough Surtling Cores?
Surtling Cores are found in Burial Chambers in the Black Forest. Explore these chambers to gather the cores you need for smelting and the valheim crafting list.
Can I place multiple workbenches in different locations?
Yes, you can place multiple workbenches around the map to establish secondary bases. Each workbench can be upgraded independently as long as you have the materials for upgrades.
Why won’t my upgrades increase the workbench level?
The workbench upgrades must be placed close to the workbench itself to be effective. Ensure all improvement structures are within a short distance to activate the upgrade.