Necesse World Settings
Necesse World Settings: All You Need To Know
Get ready gamers, it is time to check out what you’ve all been waiting for – Necesse world settings. This is your one-stop shop for tweaking every little detail of the game. From creating a chill paradise to a brutal grind, these settings let you play your way. Let’s break it all down in a fun, no-nonsense way so you can build your perfect Necesse world.New World Creation: The Name Game
First things first—naming your Necesse world. Does the name matter? Not really, but it’s how you’ll tell your worlds apart. Difficulty Modes: Choose Your Destiny
Make Your Own Necesse Server
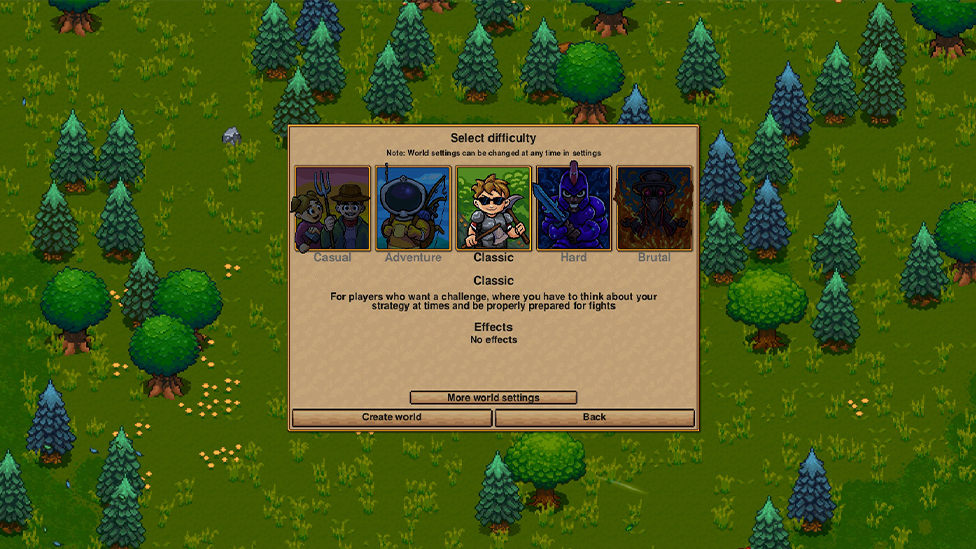
The difficulty you select will shape how Necesse treats you—kindly, ruthlessly, or somewhere in between. With five difficulty levels, the game adjusts damage taken and knockback mechanics.
Here’s the breakdown:
- Default Mode: Classic.
This is the "Goldilocks" difficulty—neither too easy nor too punishing. But if you’re feeling brave, crank it up to Brutal and see how long you last!
More World Settings: The Ultimate Flexibility
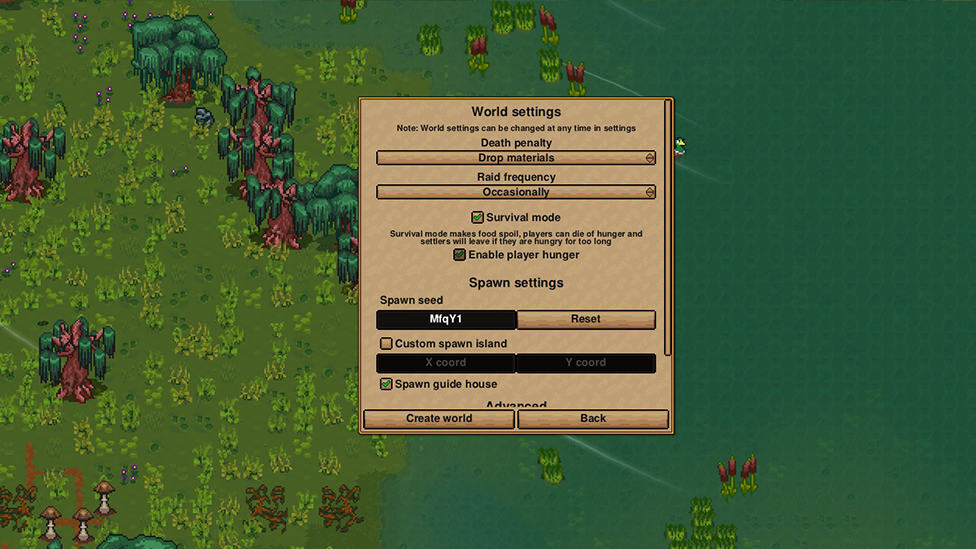
The real magic happens in the More Necesse World Settings menu. These options can be tweaked anytime, thus, you’re never locked into a bad decision. Let’s take a closer look:1. Death Penalty: What Happens When You Die?
Not all deaths are created equal in Necesse. You’ve got five penalty options, each determining what you lose when you bite the dust: Default Setting: Drop materials.This keeps things forgiving but still challenging enough to make you think twice before diving headfirst into danger.
There's also an option to enable Player Hunger here. Activate it, and you’ll need to keep your character fed to avoid starving.
2. Raid Frequency: How Often Do the Bad Guys Show Up?
Raids are part of the thrill, but how often do you want to face them? You’ve got four options to set the cool down between raids. It’s just enough to keep you on your toes without overwhelming you.Default Setting: Occasionally.
3. Survival Mode: Adding the Hunger Pains
For the hardcore survivalists out there, Survival Mode turns up the heat. Here’s what it does! Food now has a spoil timer, so stockpiling isn’t an option. You’ll need to monitor a Hunger Bar to keep your character alive. If your settlers don’t have food, they’ll pack up and leave.
Both Survival Mode and Player Hunger are enabled by default. If this sounds too stressful, feel free to toggle them off.
Spawn Settings: Your World, Your Rules
This section lets you customize how your Necesse world starts, but these settings are locked in once your world is created.
1. Spawn Seed
The Spawn Seed determines your starting island. You can enter a custom combination of 5 characters (letters and numbers) or let the game randomize it.Alternatively, you can select a Custom Spawn Island using x and y coordinates. This gives you complete control over where you begin.
2. Spawn Guide House
Need a little help getting started? Enable the Spawn Guide House to kick things off with a cozy starter home. This is a great option if you want a structured beginning or are new to the game.Default Setting: Enabled.
Advanced: Play with Time

Ever wish you could slow down the night or stretch out the day? In the Advanced settings, you can! Use sliders to adjust the day-night cycle duration. Default Setting: Day: 100%, Night: 100%.
Note: Sleeping also speeds up time by 20x. Allowing you to skip through those long, spooky nights if you’re not a fan of moonlit adventures.
Take Your Gaming Experience up A Notch with Scalacube
Scalacube is your go-to game server hosting for the most demanded games, including Minecraft, Counter-Strike: Global Offense, Baldurs Gate 3, and more.You can host a dedicated server for a smooth gaming experience with friends, free of lags and problems. You will also get access to unlimited slots, innumerable modpacks, and free subdomains - all at reasonable pricing.
Wrapping Up
Whether you’re here for the laid-back vibes of Casual mode, the strategic challenge of Hard, or the chaos of Brutal, Necesse gives you all the tools to create a world that feels just right. Explore, experiment, and tweak the settings as much as you like—you’re the boss here. What are you waiting for? Fire up the game, craft your dream world, and let the adventures begin!FAQs
How to set spawn in Necesse?
Use the Elders bed to set a spawn point inside the house. The player can also take all of the items from the Elder's Storage box, including the Local Village Map, Local Dungeon Map, Bread, and Settlement Flag, which are used to start a settlement.
How do we change difficulty modes in Necesse?
When you change the difficulty level it will also change how much damage the player receives when it comes to knockback that is given after an attack. Difficulty can be changed at any moment during a play through using the world settings or the difficulty chat command.
How to see coordinates in Necesse?
In order to see the coordinates you will have to first click “n” in the game and at the top of the map is a regional menu. That is where you will find the coordinates as well as global cords.