How to Make an Anvil in 7 Days to Die

Make Your Own game Server
It allows one to advance crafting skills—anvils will most probably be extremely important in "7 Days to Die" and can be quite indispensable, for example, later before acquiring hard tools or stuff. With an anvil, one can repair sturdy weapons or armor, among other things. Below is a guide on how to build an anvil in the game.
Anyway, don’t forget to set up your 7 Days to Die Server. Continue reading when you’ve already done that!
Requirements and Resources
Make sure you have the necessary prerequisites and resources before starting the anvil-crafting process:Forge & Hammer Perk
Obtain the Hammer & Forge perk. This perk is essential for unlocking the ability to craft an anvil.Iron
Ensure that your iron tank is no less than full. This vital metal could be harvested or even stolen from different game environments. There should be enough for you before moving forward.Clay
Gather clay from deposits. One other key ingredient in building your furnace is clay. Ensure you have enough materials of clay.
Crafting Process
For "7 Days to Die" to let you successfully create an anvil, you must first fulfill the requirements and acquire the resources. To do this, follow the comprehensive instructions below:Step 1: Access The Forge
Find a forge in your base or another appropriate site. Interact with the forge to gain access to it.Step 2: Gather Your Materials
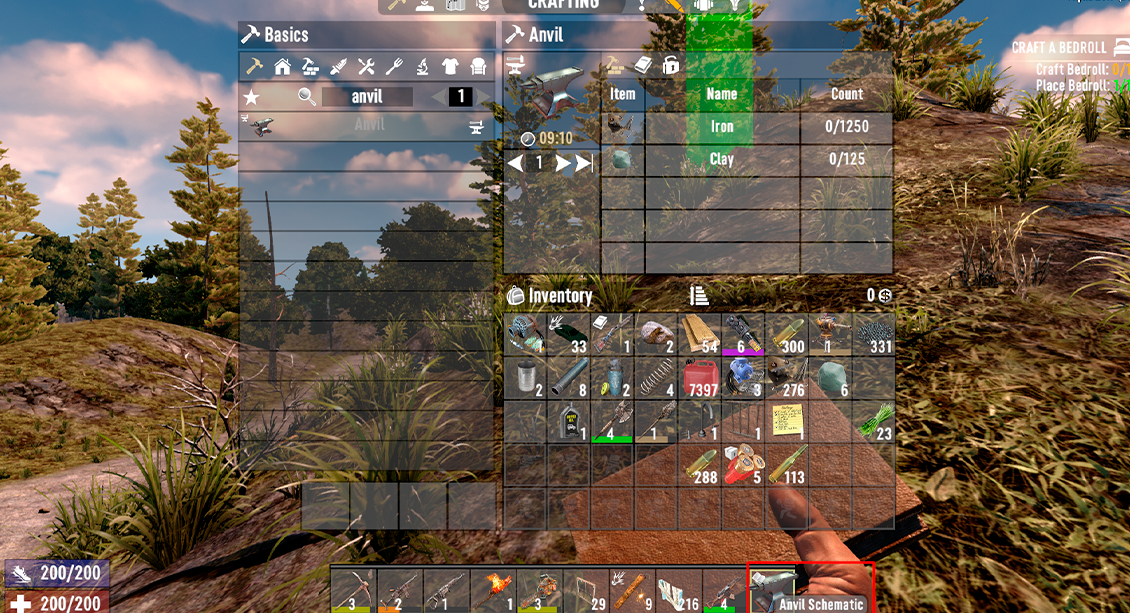
With every touch to the appropriate assignment, ensure resources through molten iron and clay are available for the forge. You must make it a point to use the forge in cooking until the molten iron and clay resources are ready for crafting.Step 3: Choose the Anvil Icon
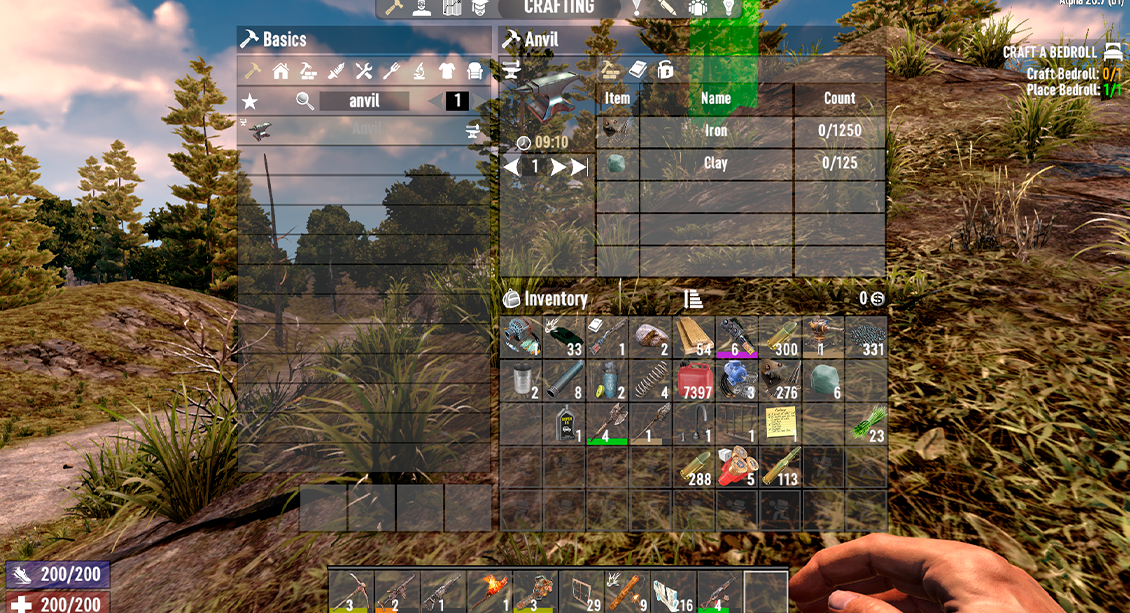
Find this icon that is placed on the left. You must be able to see a list of various types of objobjectsu may choose to create on the right opening select the object you wish to create, and left-click on this icon.Step 4: Start the Crafting Process
To begin forging, click on the "Forge" button in the description window. Upon clicking on the forge button, the forge should immediately commence, with the indication made that the anvil is now being forged.Step 5: Finishing
The anvil will be ready once the forging process is finished. Congratulations!
Tips And Recommendations
Take into account the following advice and suggestions to improve your anvil crafting experience and gameplay:- Stay Updated: Note that when it says "inaccuracy," these may refer to updates or tweaks to the game provided from time to time in such a way that things are made differently. To get the latest and most accurate crafting on how to get an anvil in the game, ensure you look briefly through the game crafting menu or other valid online and official sources.
- Find Iron Deposits: If you're just having a hard time finding iron, take some time to look for iron deposits within the game world. Either visit those places to mine the iron and get the materials for an anvil, or be a cheater and steal the iron from different areas.
- Successful Clay Collection: The deposits of clay are first decided to be sought just in a suitable place to easily collect them. Hence, it can be said that these deposits can be found in the proximity when they are near bodied waters such as lakes or rivers. Clay can be easily dug with a shovel until there comes enough quantity for crafts.
- Manage Fuel: The fuel will have to be the other key thing to your forge. Most likely, the source of fuel will be wood and other burnable things. Always check your fueling material before to be sure it has to be plenty for stocking whenever there will be a need for more.
- Upgrade Forge: Upgrade a Forge, if it is not up to the standard; applies to improvement in both total productivity and the speed of forging. It makes upgrade durations for things such as the Advanced Bellows and also cuts times for forging equipment to a drastic minimum.
- Set Your Resources in Order: Keep whole clay, iron, and other crafting supplies in order. Keep your space uncluttered with an organized storage chest or bins on the ground. In case you have to craft an anvil, this routine will help that everything will be at your disposal in a way that they won't be hard to find.
- Think Ahead: Consider how many anvils you will ever need, and you should have no worries at all. You make a lot of them at once when you have the items to do so. You will either turn around after seeing that or continue to upgrade your tools over time. Next-tier: An iron pickaxe or an auger. The bottom line is, that either one is going to make mining faster than having to use stone tools but slower compared to steel tools. Getting the needed iron and clay for smelting any of the resources for crafting an anvil will be faster than stone or iron tools.
- Protect your forge: If you happen to place your forge, place it in a completely secure surrounding to let it be away from being destroyed not soon. The process of forging can attract zombies to your vicinity or inspire other enemies. Construct a means of defense: if need be, it can be a wall, walls, or deadly traps.
- Explore & Experiment: Don't be shy to experiment in all the shown ways and techniques of crafting items on the anvil. Uncover different buildings, places, and biomes from that game world into which you are put. Maybe you will find a greater number of sources of clay and iron or reveal resource caches.
I don't have the Hammer & Forge perk, can I still make an anvil?
No, the Hammer & Forge Perk is pretty much mandatory if you want an Anvil in "7 Days to Die". Certainly, with that Perk, you can make the crafting of complex stuff available. Add more skill points and get a Hammer & Forge Perk, which will sum up to three.
Are there any alternative recipes or techniques for making an anvil?
For "7 Days to Die," the Anvil is crafted according to the "bible" laid out in the standard edition: of course, do note that some changes or hacked affections may have new crafting directives added or provided as new and varied Anvil recipes. If you're going to be using modifications, be sure to check against these for crafting possibilities.
Can I Repair a Damaged or Broken Anvil?
Anvils in "7 Days to Die" never degrade over time. Anvils, when crafted by a player, will always remain useable. However, the durability of the anvil will never repair itself. If you notice an anvil is losing toughness, you raise it back up with a Repair Kit—.
Conclusion
One of the most important reinforcements in "7 Days to Die" is to make an anvil, as it does not just open up your crafting options but also raises the game. Anvil should be intelligently used to repair tough armor, weapons, and so on which are essential for life in this dystopian world.This book should get you all readied up on how to construct an anvil with no tribulations or attempts you would otherwise make. Get used to the ways of the game, be creative, and prosper in a rugged and harsh world, only on "7 Days to Die."

Make Your Own game Server
Copyright 2019-2025 © ScalaCube - All Rights Reserved.